Wednesday, November 30, 2016

Faux Snowball Garland


I began my snowball garland with just plain old cotton balls. 


 The first thing I did was to roll the cotton balls between my hands to make them more dense and more snow ball-ish.


Next I threaded the prepped cotton balls onto fine crochet thread using a large needle that I waxed with candle wax to make it easier to pull through the cotton.


I randomly threaded my cotton balls and sparkly red, green, and white pom poms onto my thread.


This is going be so cute as part of my Christmas decorations this year.


Happy Crafting!


Tuesday, November 29, 2016

Economical Back Splash


Since I have been doing a few little upgrades around the house I decided my back splash in the kitchen needed a little something.  I was tried of just seeing the plain painted wall.

Tile just isn't in the budget right now, however, I wanted something besides just the painted wall.  I began by removing the electric outlet covers and dusting the wall to make sure my wall sticker foil would have good adhesion.

Next I made my measurements and cut out the shape to fit beneath the cabinets.  It come in rolls and is basically just peel and stick.

It is called "Mosaic Anti Oil Wall Sticker Paper, PVC Removable Kitchen High Temperature Resistant Foil". "  I was able to find this on Amazon.


I bought two rolls of this kitchen self stick back splash.  This gave me enough to cover my entire kitchen under my cabinets with just a few inches leftover.  The price on Amazon was only $9.99 a roll.


This simple little inexpensive addition really brightened the whole kitchen. 


Plus it coordinates well with the treatment I did over the stove last year.

stove wall in silver

Such a small addition to the room really had a huge impact and the silver faux grout reflects a lot of light to brighten the entire kitchen.


Happy Decorating!


Monday, November 28, 2016

Small Pinecone Wreath


I have been saving small pine cones from a neighbors tree for several years.  I now have a big bucket of these little pine cones and the tree has been cut down.

This year I decided to make a small wreath.  I began by gluing a brown colored scrapbook paper to the front side of a piece of white foam core board.

After the glue was dry I traced a large and a smaller plate onto the brown paper and cut it out with a sharp cutter.


Once my form was cut out I began adding the small pine cones with hot glue.


When I had all the pine cones glued to the form I used some of my shipping paper and twisted it into a rope that I glued to the inside  and outside edges.


This completely covered the white foam core edges.

backside of wreath


Next I lightly brushed on some faux snow to the edges of the pine cones for a snowy effect.


To the bottom center I added a natural colored little bottle brush tree and added more snow around the base. 


 Then I added a bit of vintage lace to the top to act as a hanger.  I also glued a little silver bling to the tree.


Happy Crafting!


Saturday, November 26, 2016

Week in Review


Monday

Burlap Table Runner


Tuesday

Mes Amis Antique Show


Wednesday


Shipping Paper Tree


Thursday


Happy Thanksgiving!


Friday


Happy Weekend!

Thursday, November 24, 2016

Happy Thanksgiving


Happ Thanksgiving!


I hope  everyone is having a great day.  Enjoying family, friends, and eating lots of turkey and pumpkin pie.

We are having a quiet day at home.  Just the two of us. We decided to buy our dinner from Whole Foods this year.  They do a really good job and includes everything you need for the perfect Thanksgiving dinner.

I will just cook a fresh vegetable and make a nice dinner salad.  And maybe open a bottle of sparkling cider.  Then relax and enjoy the day.


Happy Thanksgiving!

Tuesday, November 22, 2016

Shipping Paper Tree


When I receive a package stuffed with packing paper I put the paper aside for later projects.  

I had a huge stack of it ready to make my tree.  


It took about 25 feet of paper rolled into a coil for my 13 inch tree.

The base for the tree is a cardboard cone made by Darice.


I also used pearls, faux snow, chalk paint and vintage lace.


I tore my packing paper roughly 6 inches wide.


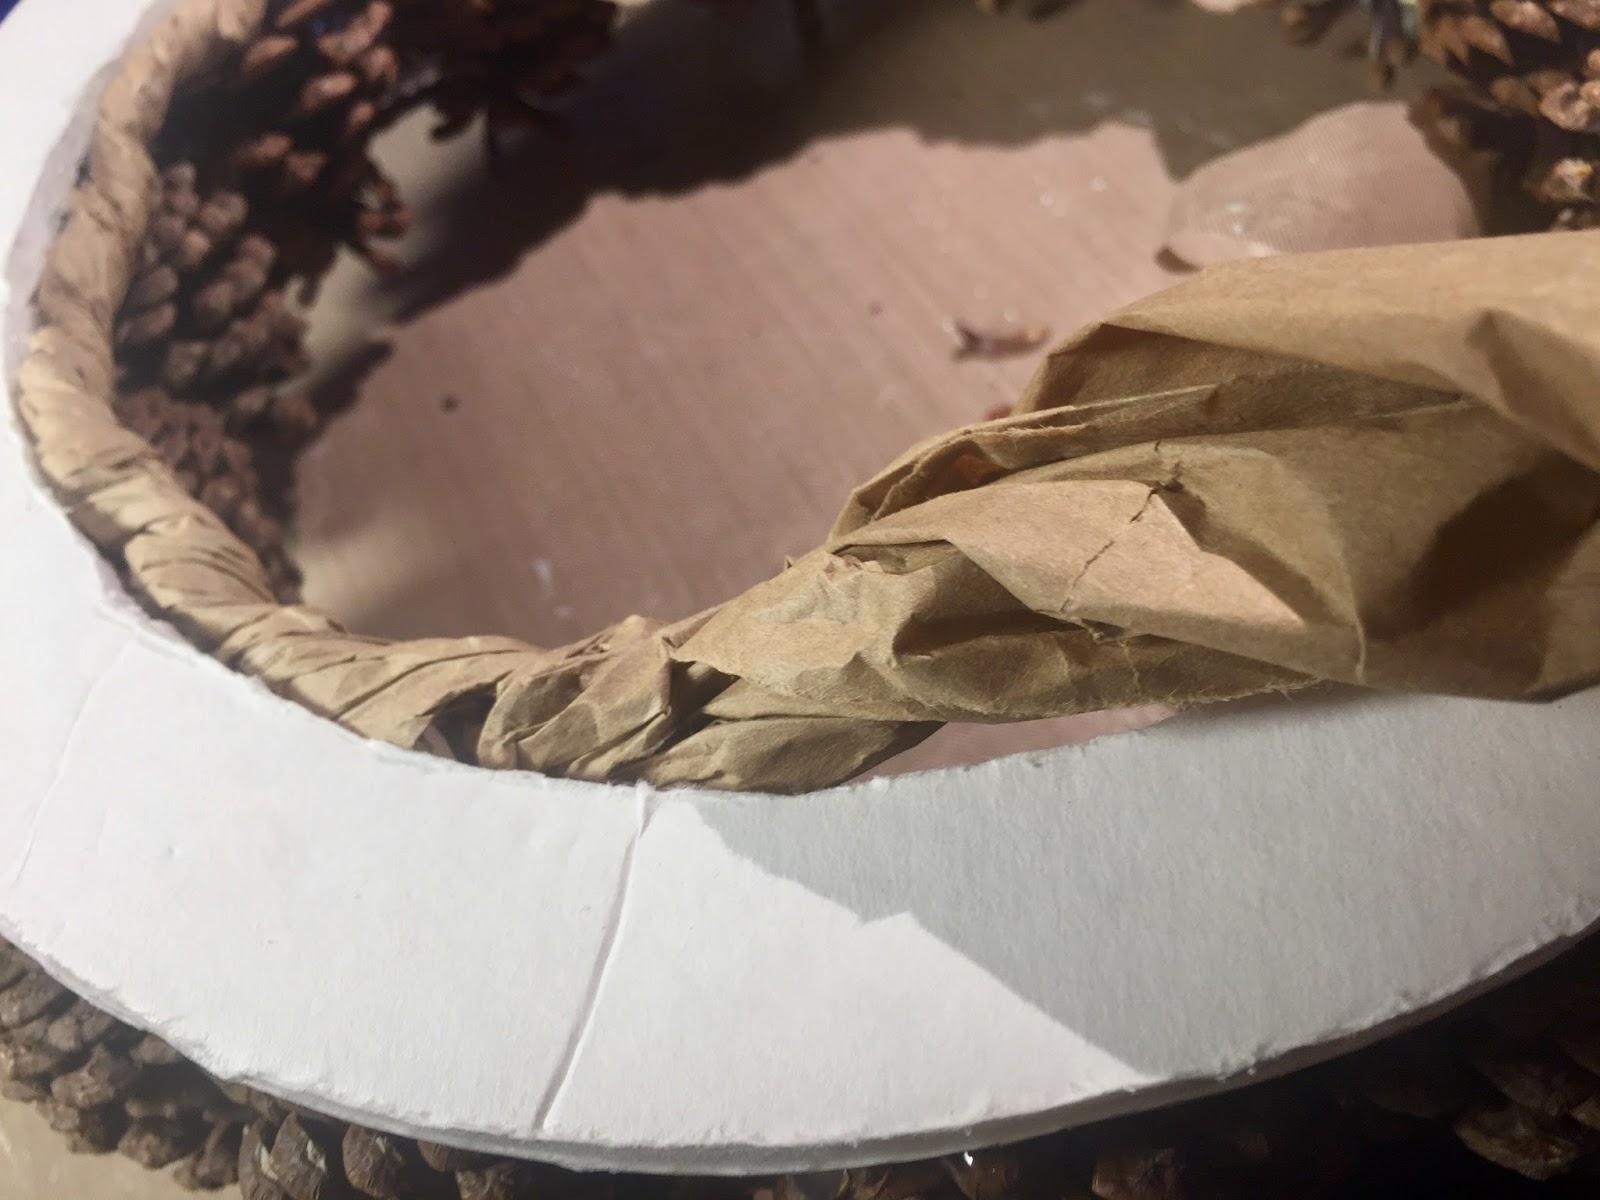
Then I  twisted the paper into a rope as I glued it to the form.


Using hot glue I began at the bottom edge and spiraled to the top covering the entire cone.


When I came to an end of the coil I inserted the new coil into the old coil and tacked inside with hot glue.  And continued to coil and glue the paper rope to the cone.


Here is the entire cone covered with the paper rope.  You could leave it like this for a rustic tree with a paper rope star at the top.  But I wanted to decorate my tree further.


I inserted a pearl encrusted stick pin I made into the top of the tree for the tree topper.


Using an almost dry paint brush I stroked chalk paint down the sides of the tree just hitting the high points.


When this paint was dry I continued decorated the tree.


I glued 4 pieces of the vintage lace to the top of the tree.


And secured the lace to the bottom inside of the cone with hot glue pulling it snuggly down the sides.


Next I randomly added the faux snow in places around the tree.


And lastly I glued two sizes of light pink pearls, to match the tree topper, as ornaments.


Oh no, there is my assistant checking out my progress to the left.  I didn't even know she was watching me.  I was having a hard time getting a good background for a picture. So I took several pictures with different backgrounds trying to get a good shot.


Happy Crafting!


Mes Amis Antique Show


It seems we are in for rain off and on during this week.  This last weekend I went to one of my favorite Antique Shows,  Mes Amis. This time it was called Mes Amis Noel with lots of pretties for Christmas.  They always have such an interesting variety of goods.

As we entered the door this cute guy was there to greet us.


There are about 40 unique vendors.  Each with a different theme.


I found a few sweet items.

Pretty lace was 5 yards, with the little tins I plan to make Christmas ornaments.

The item on the right I bought because it was only $3.00 and very interesting.  The vendor did not know what it was.  It looks like a potato masher but the metal squiggly part rotates.  Quite a conversation piece.


No one could figure out what it was used for.  Always amazed at the things you can find at one of these show.  I will use it to make something, not sure what.


This is a lovely vintage style French graphic paper I will probably use for decoupage,   It is about 5 feet long.  Part of it I can use whole and the other half I will be able to cut out the individual elements for several projects.


And then there was the piece of a bird cage.  Just the wire sides.  No one paid any attention to it until I bought.  Then the oohs and aahs began.  People were stopping me and suggesting all kinds of ideas for using it.

I think I will use it around my Christmas tree.  It opens to a nice size square.  The roof line is so cute.


Next Mes Amis is in the Spring.  Already excited and have it posted to my calendar.


Happy Shopping!