Tuesday, February 28, 2017

Vintage Metal Strainer Up-cycled


My Mother had this vintage metal strainer.  It is too old to use anymore but it makes a really cute Spring decoration.

I went through my stash and found a bird's nest, a faux bird to go with the strainer.  My plan was to add faux succulents and insects.


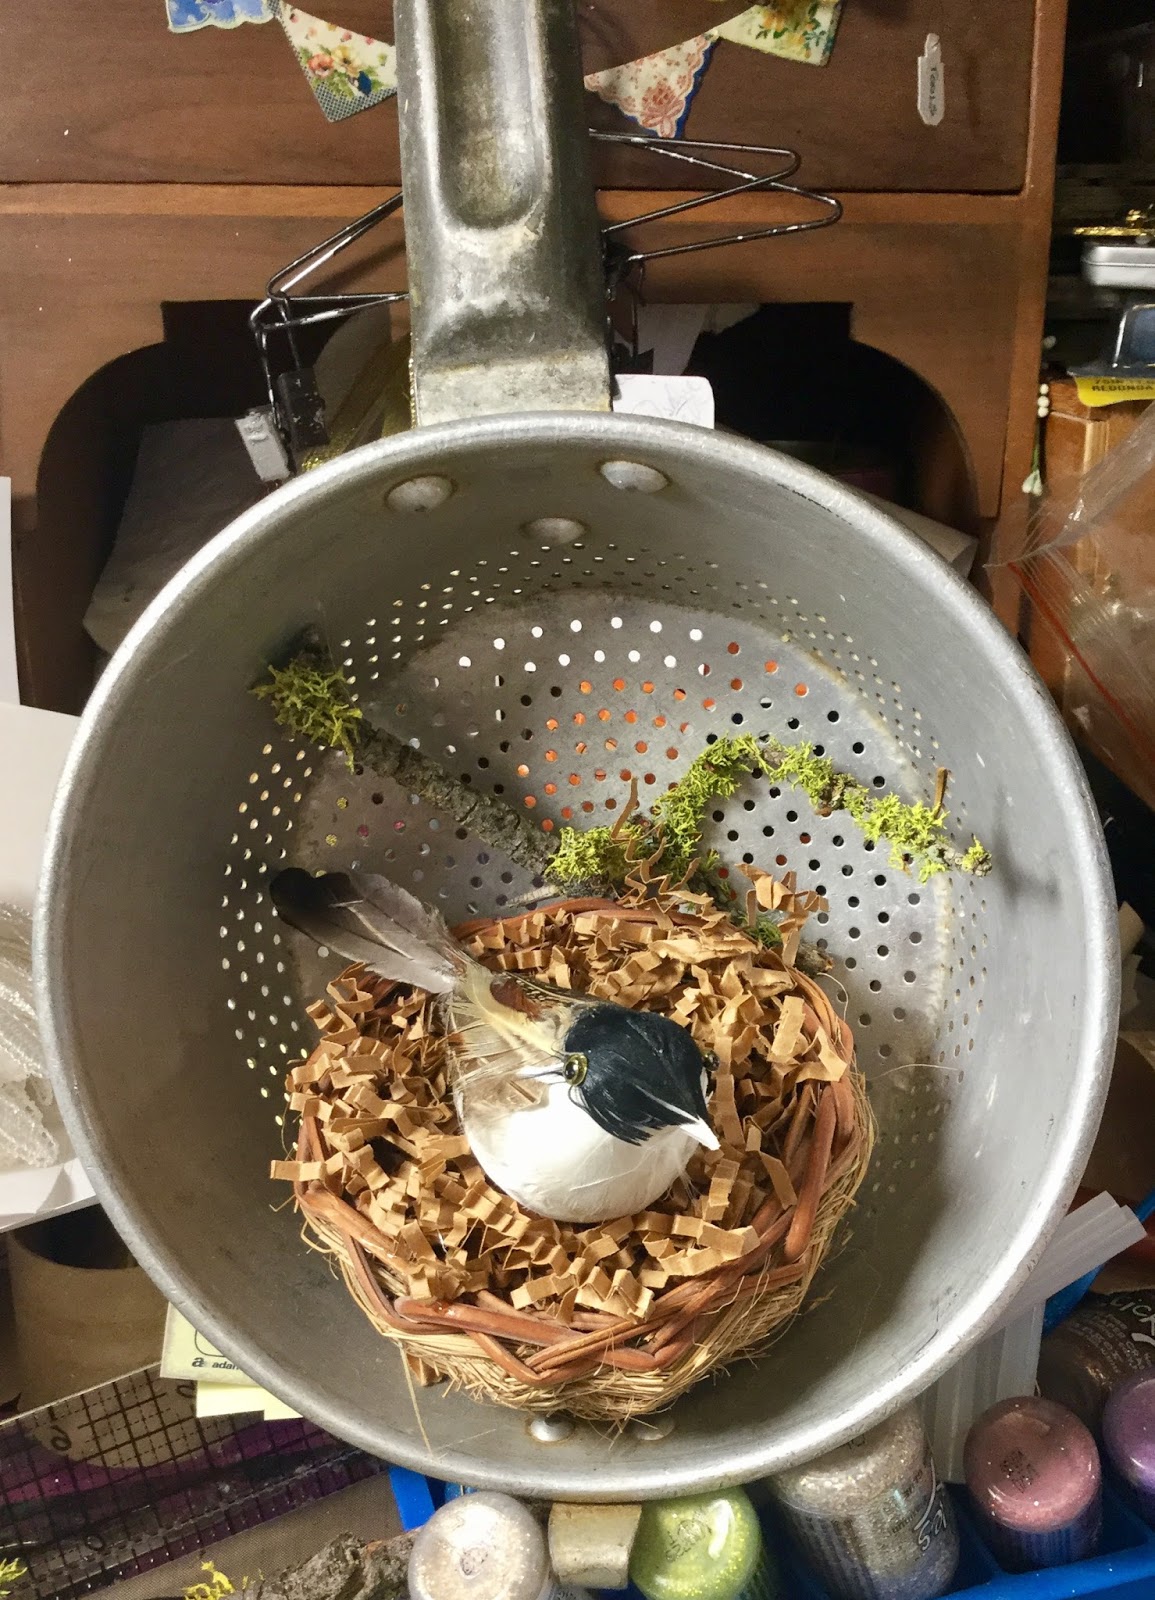
The first thing I did was to hot glue the nest to the inside of the strainer,  added some natural colored packing shred and then I added a few moss covered sticks I collected last time we were in the mountains.  There had been a wind storm and there were sticks all over the ground.  I also added the bird to the nest.


Next I glued a few pieces of moss around the bird nest.


I chose a few colors of card stock to make faux succulents.  


Using my Big Shot Machine, I cut out my succulents using the Oh So Succulent dies.


Using white ink and the stamp for the succulent tips I stamped each tip.


I also cut out a few grass pieces.


I cut out all the petals.


The next thing was to shade the tip of each petal to resemble real succulents.


Then using a  small brush handle I curved each petal.


Then glued each plant together.


Then it was just a matter of gluing all the succulents in place and adding a bee and a dragonfly I also cut out on my Big Shot.


I cut a small ribbon from vintage music and added a small succulent to the center.


Lastly I glued a icicle shaped crystal to the bottom hook.


And here is the completed project.  Now I just need to decide where I am going to hang my new bird's nest.

I have several more projects in mind using these dies and stamp set for summer decorating, too.

I love it when I can turn something that would get thrown out and make it into something new.  One less item for the landfill.


Happy Crafting!


Monday, February 27, 2017

Thrift Store Metal Planter


Here is another one of my $1.00 finds at our local Hospice Thrift Store.  Actually this is a picture of a planter very similar to the one I bought.  Somehow the original photo disappeared from my camera.  Mine started with a finish very much like this one.


I used the shade, Eterno, chalk paint to give this planter a base coat.


1st coat


2nd coat


Next I thinned down the color Sheepskin chalk paint with water.


And painted the entire piece and then took a paper towel and immediately wiped most of this color off giving the piece an aged appearance.


Once the paint was dry I gently used a piece of sandpaper to distress the entire planter.


Next I wrapped a few bouquets of silk flowers in paper to look like they just came from the flower market and placed them in the planter.

Another project for Spring decor.


Happy Crafting!


Saturday, February 25, 2017

Week in Review


Monday

Vintage Feeder Upcycled


Tuesday


Set of Silver Pedestals


Wednesday


Little Easter Lamb


Thursday


Little Thrift Store Basket


Friday

Vintage Silhouettes


Happy Weekend!

SaveSaveSaveSaveSaveSaveSaveSaveSaveSaveSaveSaveSaveSaveSaveSaveSaveSaveSaveSaveSaveSaveSaveSaveSaveSaveSaveSaveSaveSave

Friday, February 24, 2017

Vintage Silhouettes


Silhouettes have been popular in home decor for quite some time.

These two little silhouettes have been in our family over 60 years.  They were originally cut at Knott's Berry Farm in Southern California in the mid 1950's.


It was time to give them a little face lift.  Their little frames were not in the best of shape and the background paper has yellowed with time.  


There isn't much I can do about the background paper but I could paint the frames to make them blend better.

I started with a base coat of dark gray.


And when that was dry I painted both with black acrylic paint.


While that coat of paint was drying I washed and polished the glass and reinstalled it back into the dried frames.  Then I put the little silhouettes back into the frames and hung them on the wall.


And here they are hanging on our gallery wall on our stairs to the second floor.  A little bit of time and paint makes such a huge difference.


Thursday, February 23, 2017

Little Thrift Store Basket


It looks like maybe we are in of a couple of days of sunshine, again.  What a relief from all the rain and wind.  The other night it sounded like the wind was ready to tear off the roof.  The winds were close to 50 mph.  On the pass to the east of us the wind reached 200 mph.

We need a few days to dry out before the next storm hits.  

We have been super lucky.  Our backyard was under water for awhile but didn't get all the way to our back door.  Sacramento is now at 230 percent of normal rainfall.  I think this is enough now.

Good time to stay indoors and work on more crafts.


Freeway collapse


This was a very simple and quick project.

Found this cute little basket at the thrift store for 25 cents.  I thought it would be so cute as part of my Easter Decorations.


Not crazy about the color.


I liked the inside color, so I used a dry brush to just lightly coat the raised areas with a white paint.


After the paint was dry I filled my basket with a sheet of green paper grass, that I bring out every year.  Added some faux carrots, a daffodil and a vintage chicken holding an egg.


So cute.  And ready to take it's place in my Spring themed decor.


Happy Crafting!