Wednesday, November 29, 2017

Cute Little Monkey Lamp


I pulled this poor little lamp, that has seen better days, out of storage. I wasn't crazy about the colors, either.  The little candle on the right side was broken off.


First thing I did was to glue the candle back in place.


Next, I repainted the base gray and added drips to the candles using white chalk paint.  I also painted the candleholders gold.


Then I painted the shirt white and the first coat of aqua paint on the coat.  I also painted the monkey with brown acrylic paint and his pants and vest black.


Now his coat has 2 coats.


Then I painted the lamp shade, no more red.


Using acrylic brown paint and a little water I worked the brown paint into the fabric.


Then added the aqua to the top and bottom bands.  


Using hot glue I added little flame tips to the candles and painted them with yellow and orange. The final thing I did was to paint the vest and stripes down the sides of the pants with a high gloss finish to give them the look of satin.


And here he is setting on the shelf in the kitchen I recently finished .


Happy Crafting!


Monday, November 27, 2017

Best Way I Have Ever Cooked Bacon


What is it they say about bacon?  For every piece you eat,  your life will be one day shorter.  So I read at that rate I should have died in 1702.  Funny!

But that brings me to the age old problem, what is the best and easiest way to cook the bacon.

Bacon is always so messy to cook plus I don't like all the grease that is left on the strips.

I have read all the ideas and tips on the internet about the best way to cook bacon.  And so far I have not been pleased with any of them.

Then it occurred to me to try something a little different.

I preheated the oven at 375 F


 Then I started with a 1/4 sheet pan with a cooling rack inside to fit.


Next I placed a silicone baking mat over the rack.  


Then add the bacon.  Making sure there is a little clearance on all sides so the grease will drip into the 1/4 sheet pan and not run over the edge.


I start with a timer of about 15 minutes and add 5 minutes at a time until the desired crispiness is reached. I usually do this while I am cooking something on the stove that way it is easy to keep an eye on its progress.

Remove from oven and place a spoon under one long side of the sheet pan so the remaining grease can drain off and the bacon can cool.

Use at once or wrap and store in refrigerator to use on sandwiches or crumble as needed.  Use within a few days.

The strips cook and the grease collects in sheet pan and bacon is not greasy.  

Let the grease cool, wipe out pan with paper towel and toss in garbage.  Wipe off the baking mat also with a paper towel and toss.  Then wash pieces you baked with in hot soapy water.

No grease down the drain to create clogged drains and no splatters.  Finally a great way to cook bacon without mess plus the bacon stays pretty flat which is great for using in BLT sandwiches.


Happy Cooking!


Thursday, November 23, 2017

Happy Thanksgiving


Happy Thanksgiving!

Wishing everyone a peaceful day with family and friends.


Monday, November 20, 2017

Marie Antoinette Birdcage Makeover


This is a rather long post.  There were many steps to this little makeover.

I have been looking for just the right birdcage at the right price to makeover for a long time.

Not too long ago I came across this green  birdcage at a thrift store for under $5.00.  This one is quite large over 2 feet tall and about 12 inches across.


Of course, the color was all wrong.  After giving it a good washing I used a brush and painted the entire piece white using chalk paint.  I really like the matte finish this paint left on the wire of the cage.  It has a vintage appearance.


My idea was to make a light out of it with an over the top Marie Antoinette vibe.

Awhile back I also found this brand new set of placemats, napkins and napkin rings at another thrift store for $2.00 for the set of four, still sealed in the original box.  I had no idea what I would use them for but  just tucked them away for a future project.  For this project I needed a sheer fabric.  So, while going through my stash I figured these napkins would be perfect.


I used one napkin to cut out a circle to cover the top of the cage plus a seam allowance.  And used 2 1/2 other napkins to sew to the circle for the side drapes.  I stitched a large button hole in the center top for the hanging ring to slip through.  Then I used one of the napkin rings on the top to cover the hanging metal ring.


Next I cut a piece of gorgeous lace to sew to the bottom hem.

lace and gold glitter ribbon


The fabric had a loose enough weave I could slip a piece of wire through it to use as tiebacks on each side of the door.  I twisted the wire on the inside to secure and formed the ends into loops to finish off the sharp ends of the wire.


Then I cut two piece of the gold glittered ribbon about 6 inches long.  Pinching the center  I slipped it under the wire tieback to form tales for the tassels that I applied next.


For the tassels I used two tasseled curtain tiebacks I bought at a Gypsy Vintage Marketplace.  I twisted the cord and hot glued it in place to form fleur d lis for each side cutting off the remaining cording.  That left me with about 2 1/2 yards of pretty cording for another project.


I hot glued one tassel to each side of the tiebacks.


  Then it was time to fill the inside of my cage.  I tried several different arraignments.  The main item I wanted to use was a small glass shaded lamp with crystals that had belonged to Mr. Gold rush gals  mother's.

I added a few tiny vintage books, a gold tassel on the door, some dried roses and a white doily,  plus a pair of high top doll shoes.


Then I hung a string of crystals from the center inside and added a metal rhinestone crown to the top.


But I didn't like the look, so I moved the roses up front and added a French styled figurine.  That was better but still not right.  What was I missing?  Of Course, a chandelier.  But where to get one.  I thought maybe I could make one.  Well that was another whole project.


I started by Googling paper chandelier pattern images and found the perfect sized piece.


I followed the instructions, cut 2 pieces from cereal box cardboard, stapled them together along the center and folded them to form an X pattern.  I also caught a piece of string in the staples to hang the finished chandelier.


Next I painted the entire piece white and let that dry. As soon as the paint was dry I colored the tips of the candles with orange and yellow markers to resemble flames and covered the entire piece with Mod Podge and Fairy Dust glitter.


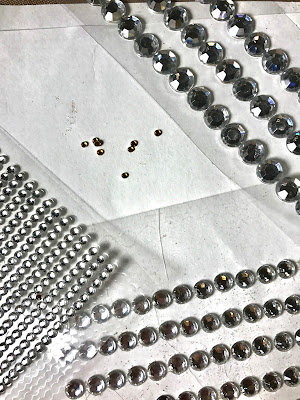
Once that was dry I added crystals to the piece and clear beads to form a little bling.  The tiny amber crystal I glued to the tips of the flames.


Now I am satisfied with my new light.  It gives off a soft glow and the new little chandelier sparkles inside the cage from the light of the lamp.
 I have it sitting on a little round table that forms its stand.  Oh, I almost forgot  I added another  piece of gorgeous white lace hot glued to the bottom of the cage itself.

Yep, it turned out over the top.  I could definitely image a piece like this in Marie Antoinette's room.  A birdcage fit for a queen.


Happy Crafting!


Friday, November 17, 2017

A few Things That Were Handed Down


I grew up in a family where out of five siblings I was the only girl child of my generation.  My uncles had no children.  So when it was time to pass things along to the next generation I was the one they left things to.

I wish I had a little history on where some of these things came from.  But even without knowing 
that I think these are interesting and part of our American Heritage.  Being a lover of history and growing up in the Gold Country of California I find these old items to be interesting and should be cherished and handed down to a new generation one day, if anyone is still interested in the good old days.

These are just some fun old items from a bygone days, most are from the 1800's, not worth very much but they do make for good topics of conversation.

I love the leather work of the deer in the center of this old black powder horn.  It looks well worn and loved as there are signs of repair.


This is an old wooden postcard with carvings depicting the wagons coming west with the Native Americans on the hill.


And speaking of Native Americans this is a very old picture of Chief Red Cloud sadly wearing white man's clothes. I am sure his native wear was much more comfortable to him.


Please excuse the reflections in the next two pictures.  I just couldn't get a shot that didn't reflect the opposite gallery wall of pictures.

We live near the California State Capital of Sacramento.  These next two pictures are of the early town and the new state capital building.  Today none of this is visible except for maybe the very top of the capital dome.  Trees and high-rises block the view.

Catholic Cathedral in center


Early State Capital

Not far up the hill is the spot where gold was discovered in 1848, this picture is of the raising of the James Marshal Monument pointing down the hill to the spot he discovered the gold.  This statue stands on California's shortest highway which goes around the monument and is only 1/2 mile long, State Highway 153.  The statue was erected in 1890 by the state Legislature at a cost of $5,000.00.


This old leather-bound photo book contains pictures of early Sacramento businessmen.  I wish I knew their names.


A pair of handmade vintage snowshoes, still in good condition.  I bring them out for Holiday decorations.


And here are a couple of scales.  The first one is an old gold scale, the drawer is filled with Native American Trade beads.


This second piece is an old Chinese Opium Scale in a bamboo carved case.


The bar of the handheld scale I believe is carved bone with weight marks carved along it's length.


This plate is from Hot Springs, South Dakota in the 1800's, part of the Badlands and is now a town of about 3,700 people.


Now heading to Promontory, Utah this is a 3 piece paper fan commemorating the driving of the final spike in Transcontinental Railway.  I have it standing in my china cabinet.


Now from farther East this old newspaper from Vicksburg is interesting reading.  I have no idea how long it has been in this frame.  I would love to see what else is written on the other side, however I am afraid it would crumble if I were to touch it.


Staying with the Civil War this is an old picture of Stonewall Jackson.


And finally this clock statue of Teddy Roosevelt, dated 1899.  Sometime over the years Teddy lost his head and the statue has been repaired but what is amazing the clock still works.


It was amazing to me when I started looking around the house to write this post.  I see these items everyday and have seen them for almost as long as I can remember. You see them but you don't notice them.  I forget how special they really are.   But putting them all down in one place seems like a pretty interesting collection of items that have been handed down to me.  I feel lucky to be the current caretaker of these little pieces of our history.

Happy Collecting!