Showing posts with label book. Show all posts

Monday, June 13, 2016

Sewing Tools Organizer


I decided I needed something to keep all my little sewing tools handy while sewing.  Like seam rippers, little scissors, hem rulers, etc.  All the little things that always seem to roll off the table when I am working.  So I designed this little cloth book.

My organizer measures about 8" x10", folded close.  But you can make it any size you need to fit your tools.

 Below is a picture after stitching together before decorating.

front cover


I started out by measuring 2 pieces of cardboard for the covers.  I measured my longest tool to determine the height of the organizer and added about a half inch for folding the organizer closed.  Then I laid those out next to each other to get the width measurement.

Next I cut 2  pieces of fabric a little larger all around then the measurement of both pieces of cardboard laid side by side with a little space between, about 1/2" should be enough for the inside and outside covers.  For the pocket side I measured and cut 4 pieces of fabric to form the inside pockets, each about half shorter the last one and the width of the main fabric.   I hemmed the top of each piece and stitched pockets to fit my tools, leaving the bottom open as this will be sewn into the seam of the main cover piece later.

I stitched down both sides, right sides together with the pockets pinned together inside between the cover fabric pieces, sewing the pockets in place on each side and across the bottom then turned the piece right side out.  I inserted one piece of cardboard then stitched down the middle forming the spine.  I slipped the second piece of cardboard in and folded the remaining open end in and stitched it close with a piece of felt in the seam, facing out, to form the inside cover piece.  Here I used a piece of brown felt.  I also  added a loop of elastic in the seam, on the outside side of the organizer, as I stitched it close to form the closure.


felt folded to inside covering tools


Now flip felt to outside and fold organizer the opposite direction with felt underneath to stand.

Here is the organizer folded backwards with the felt underneath.  This keeps the organizer standing so it won't slip when in use and flips to the inside when folded close to protect my tools.


felt folded to outside forming non slip base

I had several different pieces of flannel left over from another project so I used these to form the pockets.  Love the way all the pattern are in coordinating colors. But you could use all the same colored fabric. I just wanted to use up all those little pieces of fabric I have been saving.  The flannel helps cushion my tools and being such a soft fabric the tools don't slide out of the pockets when opening and closing the organizer. 

pockets filled with tools


here I folded the felt underneath out of the way but still under the front for stability


I used my hot glue gun to add lace to the back, inside and front covers .

back and front covers


added 2 pieces of lace to inside back cover


2 pieces to outside cover

For the front cover I hot glued a piece of  white lace fabric to the front then I glued a narrow piece of ecru lace around the edge.   And lastly glued three vintage crocheted medallions in place with a pearl glued into the center of each.


closed with felt folded to inside and elastic closure around book

Very handy to stand by my sewing machine to keep everything in sight and easy to use.


Happy Crafting!


Monday, December 28, 2015

Altered Paperback Fairy House


I just finished reading this book and thought it would make a nice fairy house.  

I know, who reads a book and says, ahh this looks like I could make a fairy house.  Mr. K  just shakes his head when I tell him my idea.  But when I was finished he really thought it looked great.

This paperback book was about 450 pages which made me think it would make the fairy house nice and full by the time I folded all the pages.


I started this project by tearing off both covers and rolling the spine together to form a circle.  Don't glue the spine together just yet.  Wait until all the pages are folded.
I started folding the pages.  I alternated every other page.  First I folded two diagonal folds a little off center to give me the pitch angle I wanted for the roof line.


The next page I folded a half page vertical fold and a small diagonal fold to follow the roof line.


I continued with these folds until all the pages where folded.
Here you can see I have about one fourth of the pages already folded.  


And here is the book with all the pages folded ready to decorate.


First I hot glued a knotted piece of jute inside the circle of the spine to form a hanging loop, then used my hot glue gun to glue the entire spine into a circle bringing the pages together making a continuous circle of pages. With my hot glue gun I added bits of lace, flowers, and flat back pearls to the roof.


With my hot glue gun I attached a lace daisy trim to the edge of the roof line.  I found pictures of windows and doors I liked on Pinterest, sized them on the computer.  Cut them out and used distress ink on the edges to cover the white cut edges.  Added some highlights on the windows and door with Glossy Accents and hot glue them to the page base.


  Again, used a lace daisy by each window and added three mini green roses in two shades on top of the daisy.  On the front door I glued a brown flat back pearl for the door knob and three white mini hyacinth flowers to form the door trim.


In the center on the bottom I made a tassel from torn strips of muslin, 3mm pearl rope and a feather that I hot glued together and pushed up into the opening formed by the circle of the spine.


I love the way it turned out.  This would be so cute in a baby or little girl's room hung from the ceiling, also would be adorable at a garden wedding with several hung from the tree branches.  
This gives me all sorts of ideas for the boxes of used paperback books I haven't been able to toss away .


Happy Crafting!


Wednesday, November 4, 2015

Wooden Book with Pull Out Drawer


 We have had two wonderful days of gentle rain.  According to today's newspaper, last year was the driest winter in 500 years.  I hope this rain is a sign of a better winter to come.


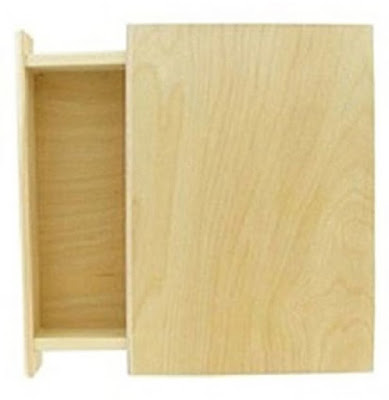
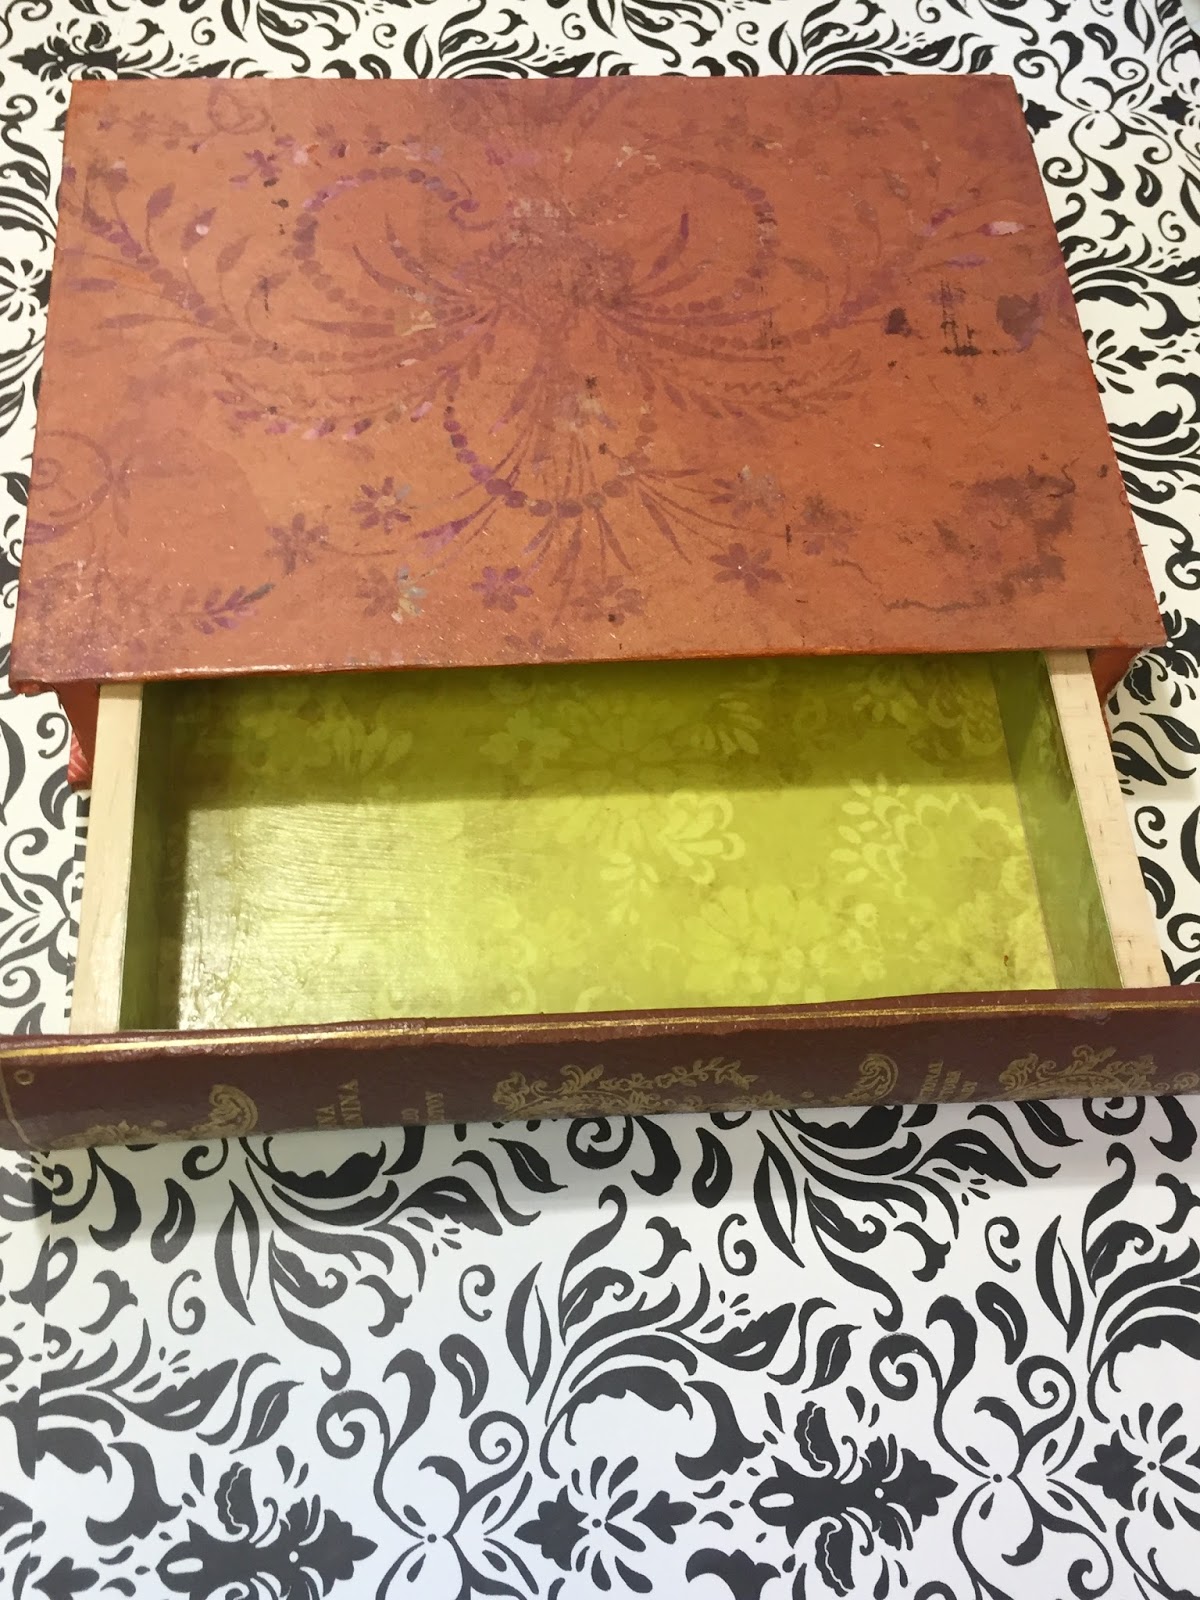
For today's project I finished this wooden book. Doesn't look like much at first glance but when completed it will hide in plain site in any bookshelf.   A good place to stash something you don't want out in the open.


You can find these wooden book boxes at craft stores or online.

I found an old book in a second hand store that the front and back covers weren't in the best shape but the spine was the right size to fit the spine of my box.  Carefully cut the spine off the book.  I saved the covers and pages for other projects.

You start by painting the top and bottom edges of the box spine to match your book spine. Next glue the book spine to the front of the drawer. (Box spine).   I left as much of the soft edge of the spine attached as I could to give me something to glue to the wooden spine.  That edge you wrap around the edge of the drawer and glue in place covering the wooden edge of the drawer.


Find yourself a scrapbook paper to match you book spine.  Paint the edges of the box to match the scrapbook paper with acrylic paint.  When the paint is dry glue the paper to the front and back of the box.  Next when your paper is dry give it a light coat of Mod Podge, if you like, to make it durable.
I found a washi tape in the same color family and applied that to the inner exposed edged of the book cover. You can just see a bit of the chevron pattern peeking out on the lower edge in the following photo. It gives the inside edge of the box the look of having end papers inside the cover just like real books have.


I had some tan packing paper, it's thinner than copy paper, that I cut the same length as the top, bottom and front edges of the book and about 1 1/4 times as wide.  Here you apply a liberal amount of Mod Podge to all the sides of the box (book pages).   Next, roughly accordion fold and scrunch the paper lengthwise and apply to the edges to resemble the pages of a book.  When that is dry lightly distress with a brown distress ink for an aged look.  Another idea would be to photo copy the edge of a real book and apply the image as your book pages.  I like the texture the scrunched paper gave.  Old books don't have smooth neat edges on their pages.


For the inside choose a coordinating paper and cut strips to glue around the 4 sides and 1 piece for the bottom.  Again, when that was dry I lightly coated the entire inside with Mod Podge.


Here is the finished book box.


And when it is put in a bookcase with other books no one can tell it is a book with a hidden drawer.


Happy Crafting!


Monday, November 2, 2015

Altered Paperback Books


I always love the antique looking books in stores like Anthropology.   However, I don't like the price tag that accompanies them.

When I saw this idea I knew it was just what I had been looking for.  
I can't recall the site that I saw this on.  
(So if you know, please comment and I will add the link}


These where just 4 regular paperback books that I had finished reading.

First thing I did was age the page edges with distress ink, vintage photo.
Then for each book I cut 2 pieces of twine, the width of the spine, and glued them to the spine.

 Next I cut a piece of plain muslin to fit the cover and using my old friend, Mod Podge, I glued the fabric to the cover molding it around the twine to resemble the ridges on vintage books.  Fraying the edges as I glued.  When that was dry I cut and tore the cover in areas to make them look more old and worn.


After the glue was very dry I used acrylic paint in gray and tan to further the aged look.
Next,  I printed out the labels and distressed and aged them before gluing to the covers and spines.
You can find lots of vintage labels on Pinterest.

After the paint and glue where dry, again I used vintage photo distress ink on the high areas and edges.
  And lastly tied the bundle together with string.

 This was a very inexpensive makeover, 4 used books, some fabric, glue, string  and paper labels.

I remember seeing the ones in the store and the cost would be well over $100.00,
great look little money.


Happy Crafting!

Wednesday, October 7, 2015

Book for Notes

My next project using the DCWV Le Tres Chic 12" x 12"  paper stack  is a little book for notes.  It contains a 4" x 6" paper pad.


Front Cover

 The notebook is made with 3 pieces of chipboard cut to desired size.  I covered the outside with the small floral pattern.  On the front cover I used the blue stripe with the Eiffel Tower image
and used one of the cut apart tags that I stamped the word "notes" in black.  On the upper and lower corners I added faux metal corner stickers and used Glossy Accents over the word "notes" and "the city of lights" that I had edged in rhinestones.

Inside has left pocket, pen, magnetic bookmark and paper tablet


4" x 6" tablet is removable  

On the left inside cover I created a pocket to hold loose notes and on the right cover I created a large pocket so the tablet is removable and a new one can be added as needed.  The penholder  is a piece of tan grosgrain ribbon inserted through a slit in the paper and glued behind.  The pen is a gel type pen that you can unscrew which allowed me to insert a small piece of paper inside to match the book.

Spine
On the spine I used another sticker from my stash with the word notes on it.  And again I sealed this with Glossy Accents.

Planning to make several of these for gifts in different paper patterns.  They would really make nice teachers gifts or for gift exchanges at work.

Saturday, September 26, 2015

Halloween Book Of Spells

Well,  the calendar may say it is Fall.  But it is already 91*.  I am so ready for some cooler weather and hopefully the end to our terrible drought.  We need rain so badly.  The whole state of California is  either turning brown or catching on fire.  Heard on the news that our over 2,000 year old Sequoia trees are in danger of dying if rain doesn't arrive soon and bring a good snow pack this year.

But back to crafting.  This is my Halloween "Book of Spells."
I used a very large old dictionary.  First I took a hammer to the edges and corners to give it an aged appearance.   I used Tim Hotlz Black Distress Ink on the edge of the pages.  Next I printed out the words Book of Spells in a font that I thought looked old and spooky.  I tore around the edges and glued that to the front of the book, traced over the lettering with hot glue from my fine tip glue gun.


Cover

Next I tore a sheet of white card stock, glued it around the words, ruffling and curling the edges to make it look like the book cover was peeling to reveal the spell book title.  Probably would have been easier to use black but that is all I had at the time. Along the bottom I hot glued on a piece of lace.  Next I painted the entire book flat black using an acrylic paint .  The mirrored wand is just and vintage spoon I flattened and glued a small beveled edge mirror to.  Then aged the mirror with alcohol inks. I cut a spider web with a Martha Stewart punch by the spoon and around the dragon's eye. For the dragon's eye I made a little paper window and glued an image of a dragon's eye that I printed off Google Images under the window. Then used Glossy Accents to make the eye shiny.  On the front and back edges I glued an old leather watch band that you unbuckle to open the book.  And covered the end of the band on the front with a tiny vintage doily and canvas button.  When everything was dry I used my finger to highlight all the raised areas with Antique gold Rub and Buff.  

Have this sitting on my coffee among the faux fall foliage.  Makes a neat conversation piece.

Mirrored Wand

Dragon's Eye

Closure

                         
Spine of Book


Hope you are having fun getting ready for Fall.