Showing posts with label black. Show all posts

Wednesday, May 18, 2016

Black and Gold Necklace


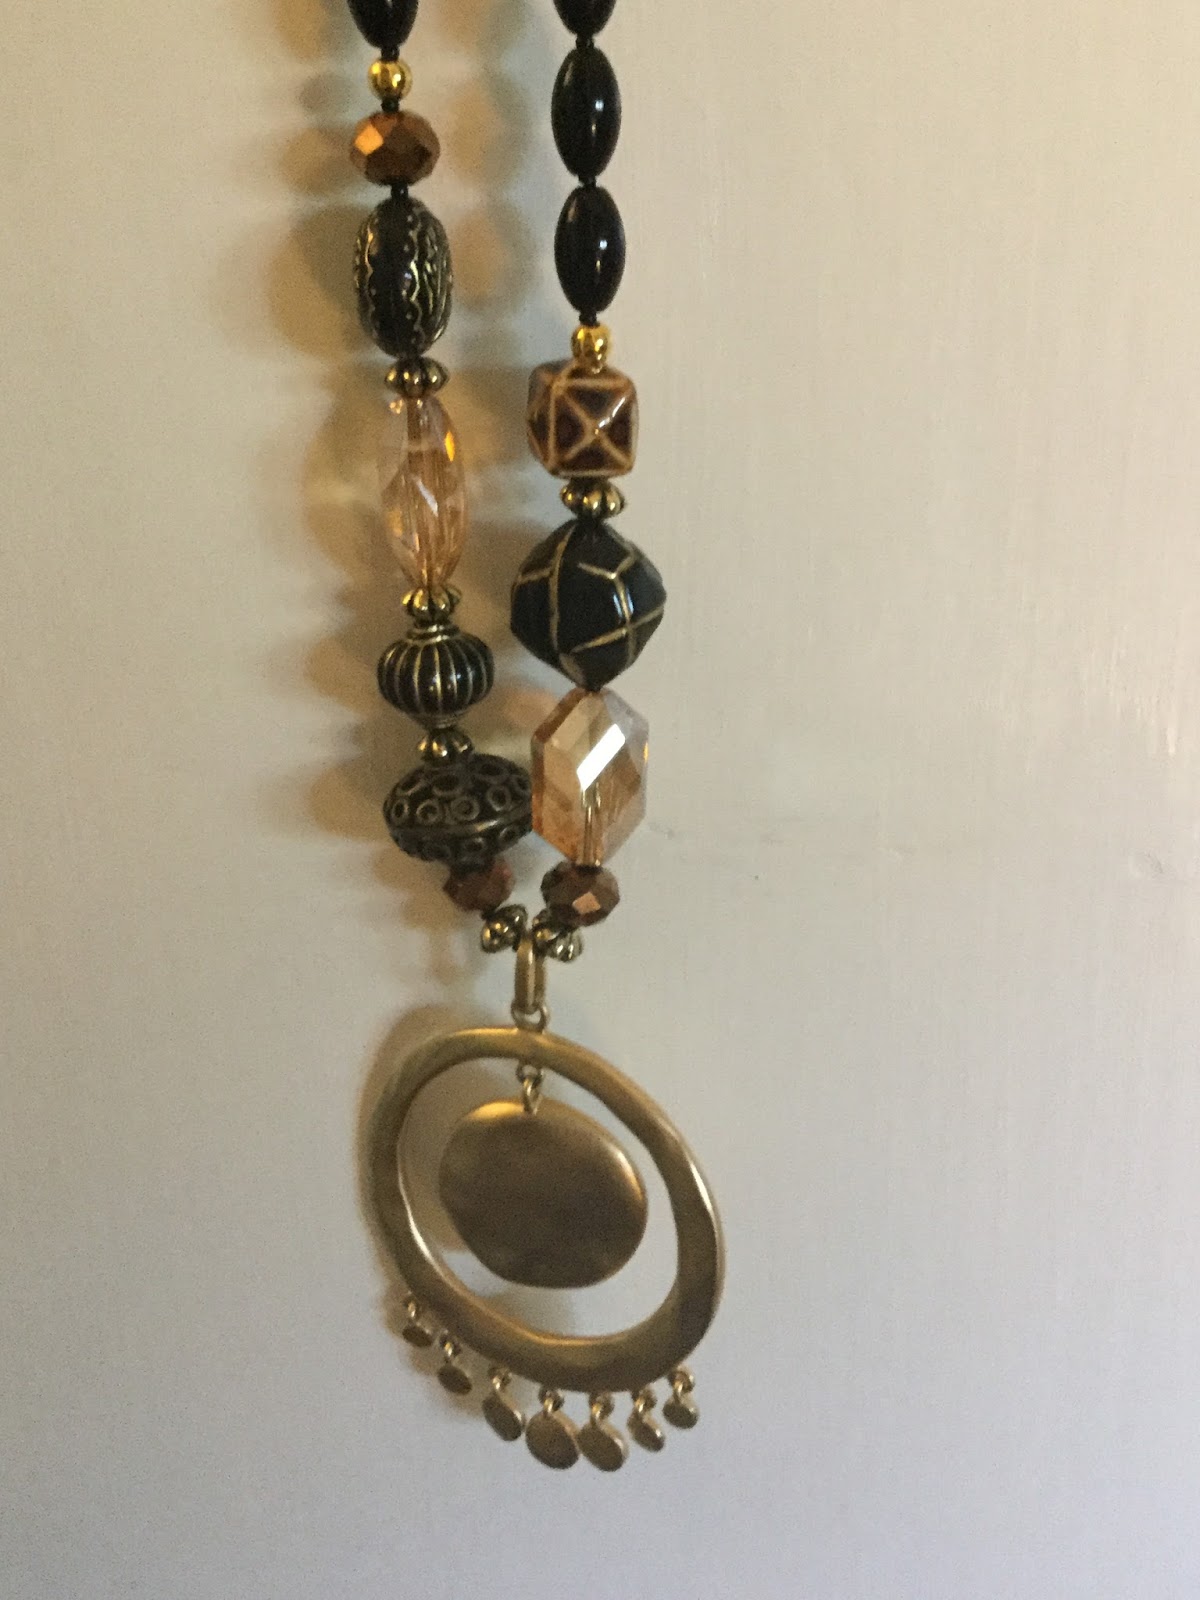
Today I decided to put together a necklace with beads from Michael's and others from my stash.  Colors I decided to use where beads in blacks and golds.  I also reused a focal piece from another piece I took apart.

Here is what I started with.


As I was stringing the beads I decided to use small black seed beads between the black beads and any other beads that didn't have a spacer.  I also added a few other black beads in different shapes to add interest.


 Here is the piece half way through with the focal piece strung.


And the finished piece.


Happy Crafting!


Friday, April 29, 2016

Vanity Color Inspiration


This small project started my color scheme for the vanity area..  I found an ugly little dark green lampshade at at second hand store awhile back. I thought it was a nice size for some future project.

 It had been laying around in my workroom for awhile.  One day I decided to give it a new look. I went through my scrapbook papers and found this animal print in pink and black. There where pieces left from another project, not enough to cover the lamp shade in one piece. So I decided to cut up the paper and deccoupage the pieces in a random order covering the entire surface on the outside.


Next I hot glued the black ribbon and bow to the top, the ball fringe and the eyelash fiber. I glued the pink crystal trim to the bottom and more eyelash fiber.

The inside is painted gold.


I added the shade to a vintage glass lamp. They make a really cute accent light.  Not a lot of light,  just a little more than a nightlight.


That's when I decided to change the colors of my vanity.

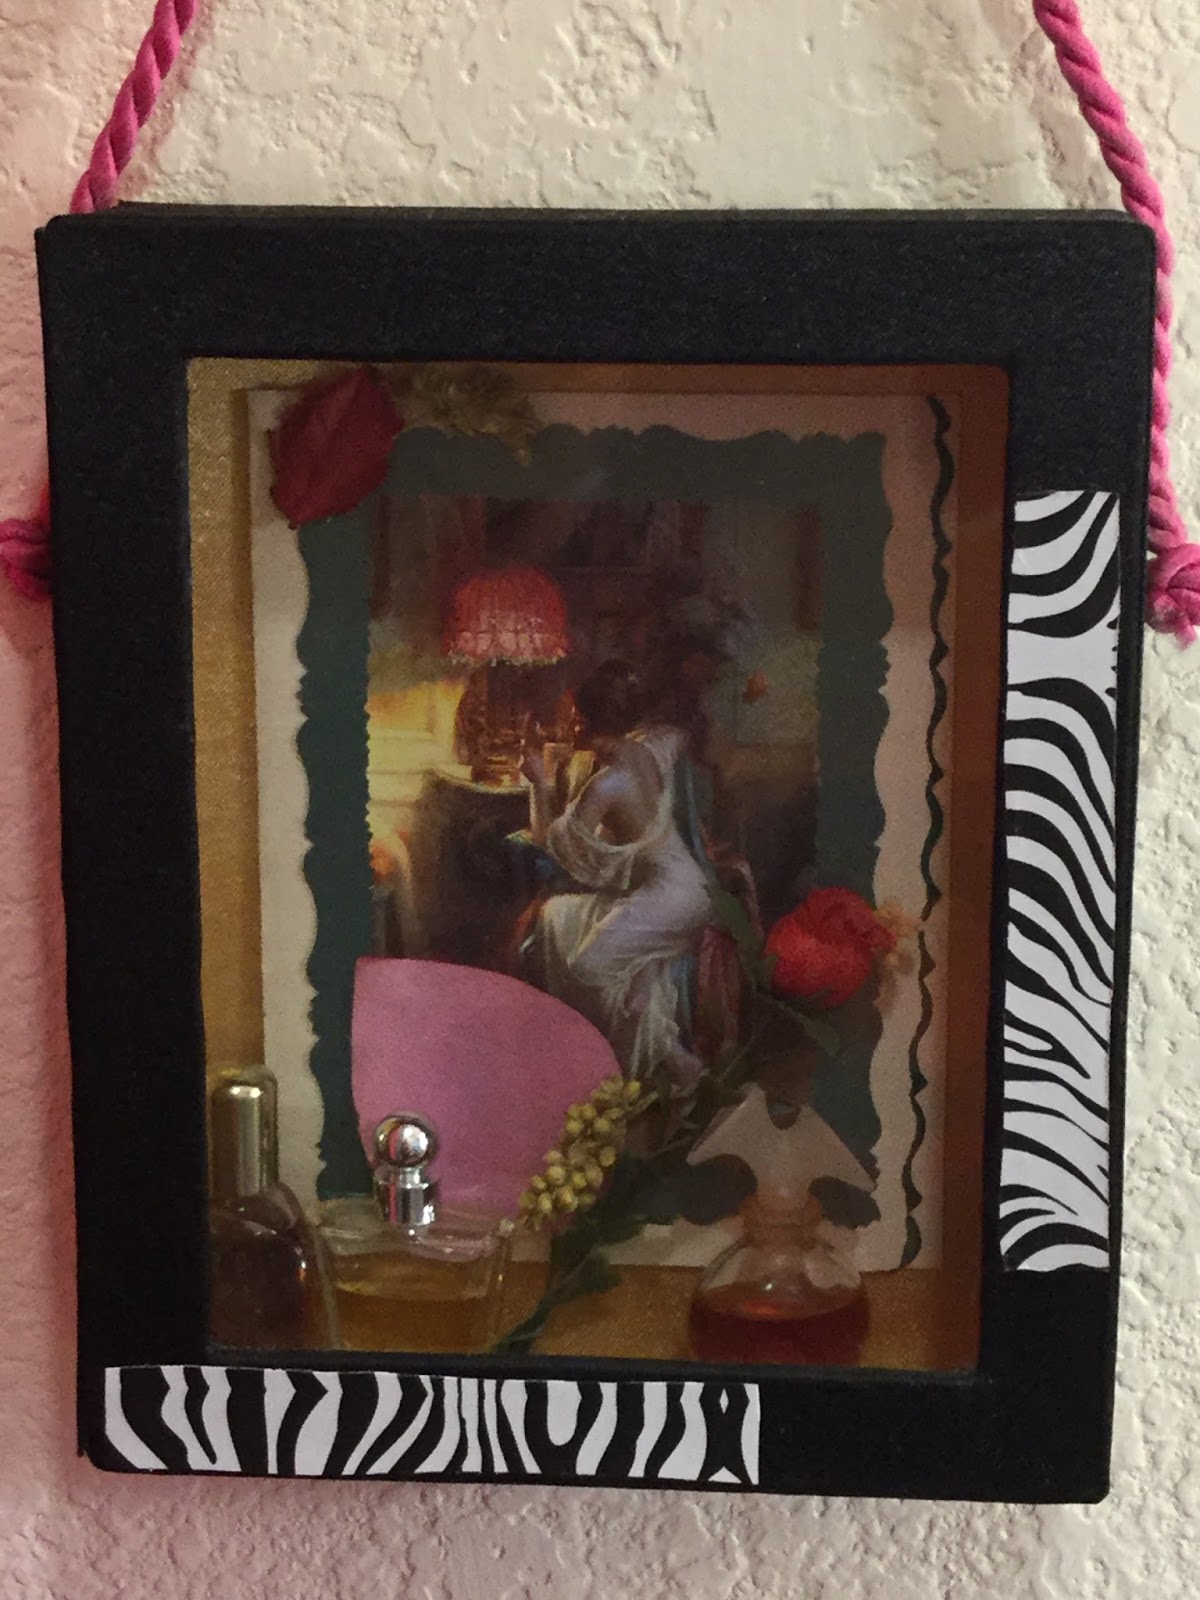
The next item I made was a shadow box with a vintage vanity theme using a picture from Pinterest.  For the shadow box itself I used an empty black velveteen box I believe perfume came in, it had the perfect window.  And the inside was already gold.   I matted the image and glued it to the inside of the box added a couple of tiny faux flowers and a trio of miniature perfume bottles.  On the outside I glued a piece of pink cording for the hanger. And on two sides added a small strip of the zebra adhesive paper.


Then the search was on.  I needed to find items with black zebra stripes and hot pink.

For the vanity skirt and bench seat cover I bought a set of extra long twin bed sheets in a Zebra pattern.  Believe it or not the set only cost $3.99 on Amazon.  And I knew that would give me plenty of fabric to work with.
My zebra collection grew and grew from there.  And the project  continues.

Happy Decorating!

Thursday, April 28, 2016

Vanity Facelift


I have mostly soft colors in my house.  I go mainly for the shabby chic vintage look. But I decided I wanted to give my neglected vanity area a facelift.  And I also decided I wanted to use some eye opening colors.  You know,  something bright to get me energized in the morning.  So I decided on hot pink and zebra stripes for my color theme.

This is the before shot.  When I said neglected I really meant it.  I haven't had reds in my house for at least 10 years.  But somehow this little corner upstairs just got forgotten.


I have a large mirror above the vanity but I am not sure that I will reuse it here again.  I have another one in mind.  It isn't the right color so I will need to paint it, also.


Here is the vanity all undressed, I mean totally naked.  A friend gave this to me about 15 years ago, it had been hers before she moved out of state. I knew one day I would give it a complete make over.


And here is the progress at the end of day 1.  It might appear to be finished but there's still alot of work left in this area.


For the top of the vanity I painted a 2" stripe around the top edge in hot pink.  When that was dry I cut a piece of adhesive zebra print shelf paper 2" smaller than the top and attached that.  Then I ran a gold stripe between the two all the way around the top using a gold leaf pen.  I plan to have a piece of glass cut to cover the top when I am all finished.

Update: After the gold ink dried I decided the line was not bold enough so went back over it with a small paint  brush and some gold  acrylic paint.  Much butter.

For the skirt I cut a flat twin sheet in half longways and then again the short way to make two long pieces that I hemmed and gathered.  To attach the skirt to the table I stapled the hook side of hook and loop tape to the front edge and stitched the loop side of the tape to the skirt.  I also stitched some small black ball fringe along the top of the skirt pieces.  This makes the skirt easy to remove and launder. For the bench seat cover I used the pillowcase from the set.

To the left of the vanity is the door to our furnace.  Not very attractive so I hung zebra print and hot pink sheer curtains from a rod above the door to hide it yet leave it easily accessible to change out the filters.

The project continues tomorrow.

Happy Decorating!

Saturday, October 3, 2015

Black Spider Web Lantern

Here is a quick craft that would be cute on a windowsill, table or part of a front porch display for Halloween. (It was hard to get a good photo, black doesn't show up well.)


I started out with just an empty glass jar, like the ones spaghetti sauce comes in. I ran it through the dishwasher to make sure there was no greasy residue left on the glass.  I wanted the paint to adhere well.  Next  I drew a spider web on a piece of copy paper that I had cut down to fit the jar and taped it to the inside with the web facing out.  Using my hot glue gun I traced over the lines of the web and let it cool.  I used my hot glue gun with a fine tip. 
empty jar
Spidy on the jar
   Next I painted the entire jar, including the lid, black.  I just happened to have chalkboard paint handy, but I am sure any black acrylic paint would work.  I thought that since the chalkboard paint is a little thicker I wouldn't need more than one coat of paint.  Some areas I did end up giving a second coat of paint.  
Spooky Lantern at night
But didn't  completely cover the jar with a heavy coat of paint.  I left some areas thinner to allow the light to show through. 
 When the paint was dry I used my hot glue gun to adhere the fuzzy spider, that I bought at The Dollar Store,  to the lantern making sure not to glue the lid so I could insert a battery operated tea light inside.


Tuesday, September 29, 2015

Trick or Treat Banner


Here is the new Halloween banner I just completed.  I purchased a fabric panel online at Fabric.com.  It looked really cool when it arrived.  So I got busy.  First I ironed the panel, then bonded it to a plain piece black cotton fabric for the backing.  Next I cut each flag out. 


 I thought it look too plain so I took them all to the sewing machine and stitched a fancy border around each one. The two end pieces with the sculls I decided to use a stitch that reminded me of Skull and Crossbones.  On the remaining flags I stitched a feather type stitch.  Still too plain. 
 So off to my craft table and with a little Tim Holtz Distress ink I added some dirt and age with black.  Gives it a sooty look. Next I used my hot glue gun to add a few skulls, bats, and orange rhinestones.  Well, now it needed color.  Right? So off to my stash for some orange and black fibers, orange ribbon and a little orange netting trim. Finally I used my punch to make a hole in each corner and strung each flag on  brown twine. I ended up putting just a dab of hot glue in the center back of each flag on the banner to keep it from sliding along the twine. 

I love the way it turned out.  It's almost October so time to get the Halloween decorations out of the garage and figure out which one I want to use this year.


Saturday, September 26, 2015

Halloween Book Of Spells

Well,  the calendar may say it is Fall.  But it is already 91*.  I am so ready for some cooler weather and hopefully the end to our terrible drought.  We need rain so badly.  The whole state of California is  either turning brown or catching on fire.  Heard on the news that our over 2,000 year old Sequoia trees are in danger of dying if rain doesn't arrive soon and bring a good snow pack this year.

But back to crafting.  This is my Halloween "Book of Spells."
I used a very large old dictionary.  First I took a hammer to the edges and corners to give it an aged appearance.   I used Tim Hotlz Black Distress Ink on the edge of the pages.  Next I printed out the words Book of Spells in a font that I thought looked old and spooky.  I tore around the edges and glued that to the front of the book, traced over the lettering with hot glue from my fine tip glue gun.


Cover

Next I tore a sheet of white card stock, glued it around the words, ruffling and curling the edges to make it look like the book cover was peeling to reveal the spell book title.  Probably would have been easier to use black but that is all I had at the time. Along the bottom I hot glued on a piece of lace.  Next I painted the entire book flat black using an acrylic paint .  The mirrored wand is just and vintage spoon I flattened and glued a small beveled edge mirror to.  Then aged the mirror with alcohol inks. I cut a spider web with a Martha Stewart punch by the spoon and around the dragon's eye. For the dragon's eye I made a little paper window and glued an image of a dragon's eye that I printed off Google Images under the window. Then used Glossy Accents to make the eye shiny.  On the front and back edges I glued an old leather watch band that you unbuckle to open the book.  And covered the end of the band on the front with a tiny vintage doily and canvas button.  When everything was dry I used my finger to highlight all the raised areas with Antique gold Rub and Buff.  

Have this sitting on my coffee among the faux fall foliage.  Makes a neat conversation piece.

Mirrored Wand

Dragon's Eye

Closure

                         
Spine of Book


Hope you are having fun getting ready for Fall.