Monday, November 7, 2016

New Thrift Store Finds


I went to my favorite Thrift Store half price off day and found a few things I had been wishing for.

The store is up in the mountains, so it is always a lovely drive.  And draws people from all over the area.  Next week will be their annual Christmas Sale.  Oh what fun.


I have been wanting one of these Stampin Up rolling stamps.  This set was only $1.25 and has stamps for 4th of July, Christmas and roses.  It even had an unopened ink pad.  There was a Santa rubber stamp also in the container I found the rolling stamp in.


Love these wooden rings for $1.00 each.  They fit around decorator collector plates, adding a frame around the plate.  So pretty.


Then  there was this little plate for  $.25 and a few glass candlesticks for crafting.  The rose is so pretty.  I love plates with roses and am always on the lookout for stray pieces like this one. 


I thought these little drawers would be perfect in the bathroom to store small hair items like hair clips and bobby pins once I paint it.


For the tray I plan to paint and tile the bottom with some tiles I found at Home Depot for $.50.

In the picture below I did a dry run to see how the tile would fit.  This will be perfect in the kitchen by my coffee station.  Another project on the horizon.  But with the Holidays approaching so quickly who knows when I will get to this makeover.


I spent under $20.00 for my entire haul.  But what I haven't shown yet is the best piece of all.  I knew when I saw it that it was a very nice item.  But had no idea just how nice until I got home and looked up the price.  On a site that sells these Howard Miller clocks with Piano style finish each clock was priced well over $100.00.  What?  I couldn't believe it and I only paid $1.50.

Here is my prize for the week. The wood is so beautiful.  Totally amazed by this find.


Happy Hunting!


Saturday, November 5, 2016

Week in Review


Monday

Antique Scale Redo


Tuesday

Halloween


Wednesday


Christmas Shovel Repainted


Thursday


Broken Water Pitcher Repair


Friday

Jars with Vintage Labels


Happy Weekend!

Friday, November 4, 2016

Jars with Vintage Labels


I have been saving jars for awhile. So the other day I went onto Graphics Fairy and downloaded a few vintage labels.

  First thing I did was to print them off with my laser printer. 


 A few of them I painted with watercolors and the rest of them I left plain.


I especially like this vintage bottle with the vintage label.


I brushed Mod Podge to the back of the label and applied to the bottle carefully wiping away any glue on the bottle and smoothing carefully to remove any wrinkles or bubbles.  When the labels were dry I added a protective coat of Mod Podge to the front of the labels.  You can wipe the labels with a damp cloth when necessary to clean the outside, but I wouldn't submerge in water unless you want to remove the label entirely.


These I plan to use to store dry goods like rice and pastas in the larger bottles and dried herbs from my garden in the smaller ones.


This set I picked up awhile back at one of the craft stores.  I want to find corks to fit the tops and plan to use these for herbs and spices, too.


These I have already filled with things like peppercorns and alphabet soup pastas.


I really like these little jars they are useful again, plus I have saved them from the landfill.


Happy Crafting!


SaveSave

Thursday, November 3, 2016

Broken Water Pitcher Repair


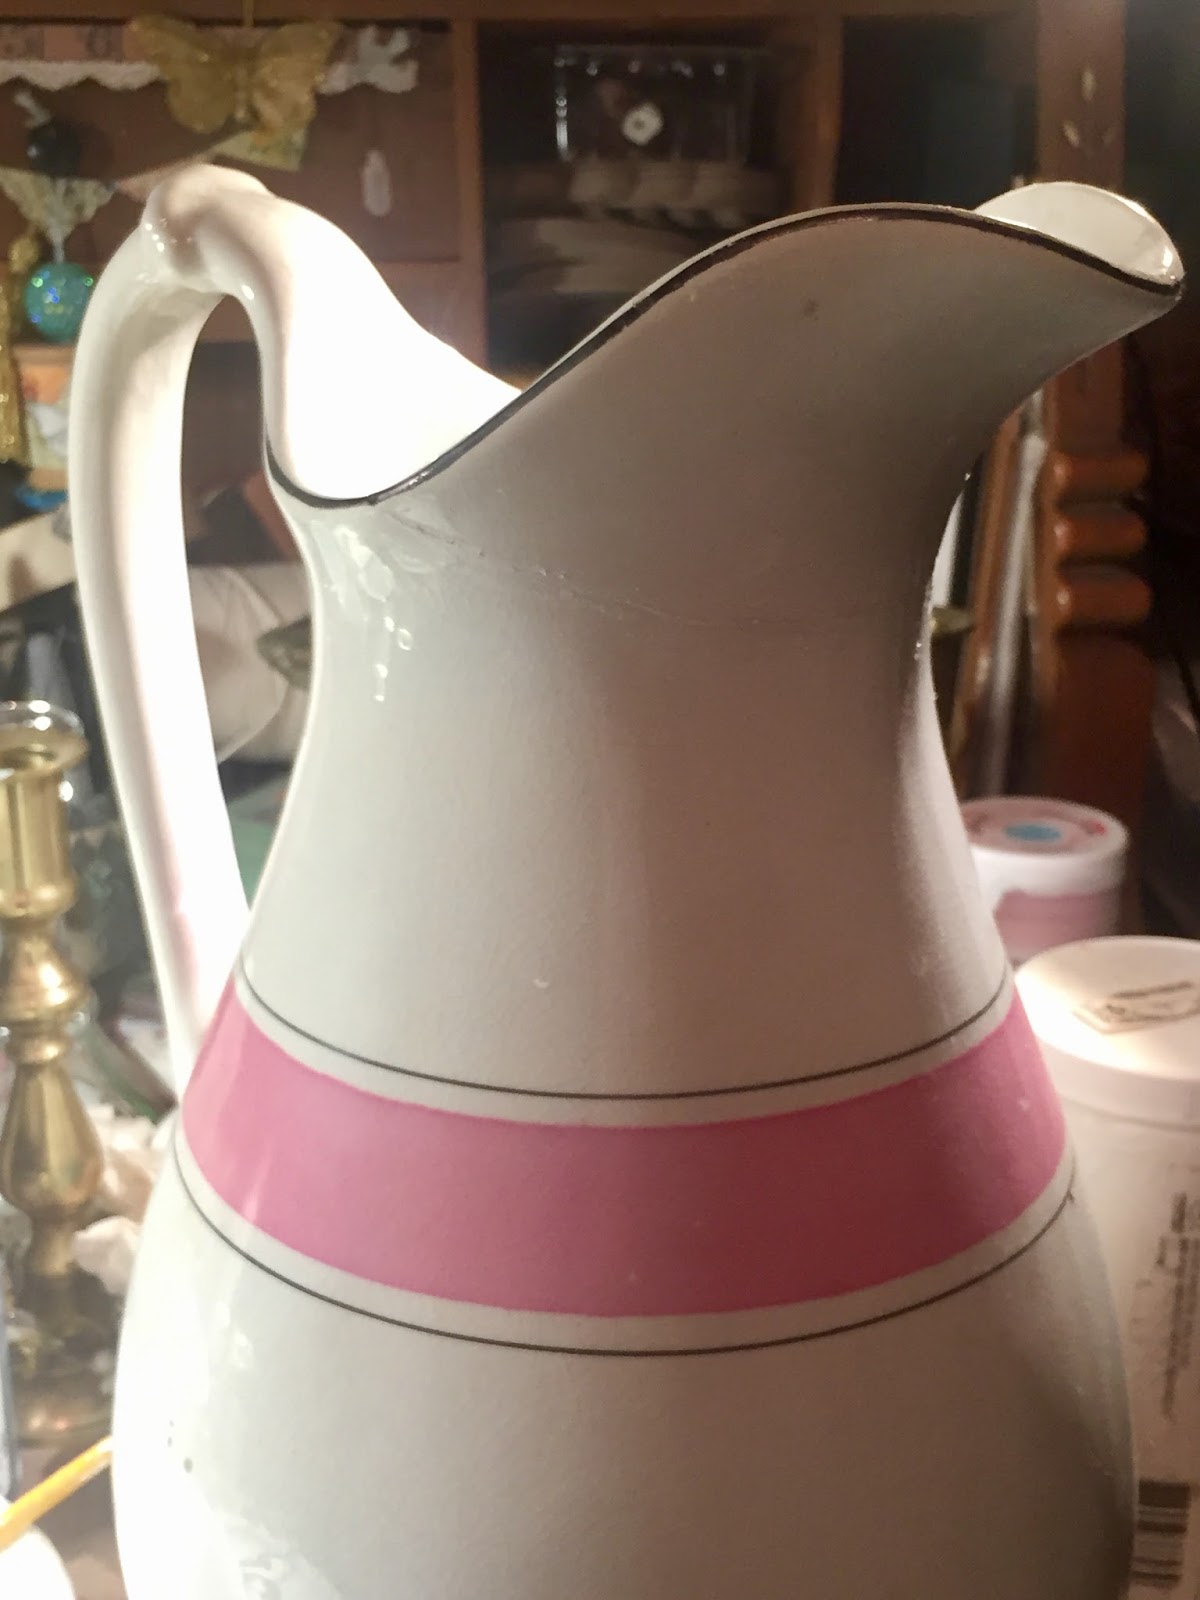
Over the years I have collected a few bowl and pitcher sets.  One of my favorites is a white ironstone with a pink stripe around the middle of the pitcher.

The other day I was moving and dusting them when I dropped that favorite pink pitcher.

I just couldn't bring myself to toss it out so I decided to make a repair.  I usually just throw a broken piece out if it breaks this badly.  But I just didn't want to loose this graceful old pitcher that I adore so much.

The front lip broke off in about five pieces.  I found all the pieces and glued them back in place.
I let it set for a couple of days to make sure the glue was cured.  I used Aleenes's Tacky glue to put the pieces back in place.

It was pretty sad looking but all the pieces were back in place and my heart was broken.


Once the glue was dry I mixed Fix All with enough water to make a very wet slurry about the consistency of pancake batter.

This isn't what this product is made for, but it works wonderfully.


This is a pitcher I repaired many years ago with this same technique.  Except this pitcher was broken into about 20 pieces.  It was my mother's and she was going to toss it away.  So I took the pieces home and began glueing.  The handle alone was in 5 pieces.  It was so pretty I just had to fix it.  Of course it doesn't hold water anymore but it makes such a pretty vase fro hold silk flowers.

Close up it is still looks good and the breaks are almost impossible to find.


So back to this pink and white pitcher.  I used my brush to add layers of the Fix All building up the layers until all the cracks and chips were filled in level with the rest of the pitcher and carefully wiping off any extra before it hardened.

When the Fix All was dry I mixed acrylic paint to match the white ironstone and using a very fine brush I painted over the cracks to hide them.

If the cracks are still noticeable sometimes I will paint over them with clear nail polish.  This will make the area shiny and the damage almost disappear.


 When the white paint was dry I went over the black stripe and filled in where the chips and breaks had damaged it.


And here it is back on the top of the cabinet looking whole again.  I know it is broken but at least now  the cracks aren't really noticeable anymore.

And my favorite pitcher can still be on display where I can view it daily.


Happy Crafting!


Wednesday, November 2, 2016

Christmas Shovel Repainted


It was about this time last year that I bought this decorative shovel at an estate sale.  It took awhile but I finally decided how I wanted to repaint it.

It was OK, but I wanted it to be more whimsical.


Here is what I began with.


I used 3 colors of acrylic paint, orange, black and green plus black and white chalk paint.

I like to use paper plates for my paint palate.  A lot of the time I can let it dry completely when I am done and just peel it off the plate and use it again.


The first thing I did was to paint the metal portion black and let it dry.


Next I added the shape of the snowman's face with white chalk paint leaving the edges a little feathered and let that dry.  I applied a pretty thick coat to give it some texture.


I painted the nose on the raised area of the shovel with orange and added black eyes and mouth.


At the top I painted greenery on each side of the head with the green paint.


Next I tied a red snowflake ribbon to the top of his head.


And added faux snow to the greenery and the face.


And here he is all dressed for the Christmas season.


Happy Christmas!


Tuesday, November 1, 2016

Halloween


Well we finally have our bathroom water pipes fixed.  We had a new shower and tub facet installed.  Looked great but after the plumber left I found a pin hole leak where he sawed the wall board away. It was so small I didn't even find it right away.

Next we are waiting for our new tub surround to arrive.  Then the tub /shower will be complete.   I will be getting new flooring.  That will finish our mini makeover for the main bath.

Last night we had a few trick or treaters between rain showers.
Was hoping for dry weather for the kids.

Here are our decorations.  Had to have them inside out of the rain this year. The kids could see these in our entry hall.

My skeleton pirate and his skeleton dog with red eyes.


I found a Jack Sparrow mask on Pinterest I added to my pirate.


dogs glowing eyes


Black pumpkin with glowing green eyes.


And in the yard we had a few scattered headstones.


And on the double front door we had a crow wreath on the door draped in black cloth and a candy corn wreath on the outside of the other door.


Some of our neighbors really decorated their yards.


So we were sitting there watching Hocus Pocus, between the ringing doorbell.  Hope your Halloween was Ghoulish.

Happy Holidays!