Showing posts with label vintage. Show all posts

Monday, August 8, 2016

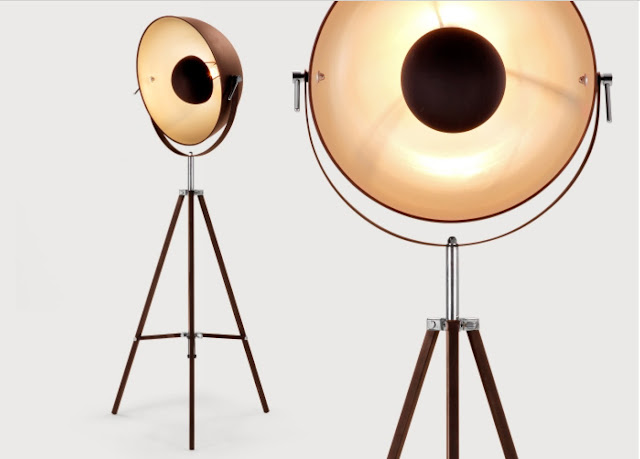
Tripod Lamp -Pottery Barn Inspired


I have been wanting a floor lamp that I could use over my worktable.

I have seen Tripod lamps at stores like Pottery Barn and West Elm that would be perfect but they run $100.00 to $400.00.  Way too much money to spend for a lamp as far as I am concerned.


I was lucky enough to inherit one of my Grandfather's camera and tripod.  They have been sitting around the house for years.  I use the camera in seasonal displays along with other vintage items from time to time.  


But the tripod has just been in the corner stored in it's leather case.


My Grandfather was a great photographer in the late 1800's and early 1900's.   I know that sounds like a long time ago, but my family has a very long life span.  One of his brother's had a drivers license at 100 years old.  I also inherited some of  his original glass photo plates with early pictures of Michigan and Los Angeles.  I would love someday to find someone who still knows how to develop those old glass plates.  I have heard there's now a digital method to make negatives from them with a special scanner. It would be so much fun to see those pictures developed again after all these years.

Well, back to my lamp.  One day I was looking at his tripod and the thought came to me, that would make a perfect lamp base.  I didn't want to alter the tripod, so I gave it some thought and came up with my easy lamp idea.

clip on utility lamp


So I gathered my supplies, the tripod, a metal clip on light and a LED light bulb.  That's it, instant lamp.  And one thing about using an actual tripod the lamp can be adjusted in height from floor height to table height and anywhere in between.   Also by using a LED light bulb the metal shade stays cool to the touch.


I just clipped the lamp to the top of the tripod and I had my new lamp.  Simple, quick and oh so bright.

I only spent  $10.23 to make my new lamp.  And the light is perfect and bright for working on detailed projects.  No more squinting under low light.


And best of all I found a new use for my Grandfather's vintage tripod.


Happy Crafting!


Wednesday, August 3, 2016

Christmas Album - The Making


I bought a couple of downloads from two of my favorite digital artists on Etsy,   Tsunami Rose for the album cover and Ephemera's Vintage Garden for the pages.

I began by printing everything out on my laser printer.  I glued the covers and spine to chipboard induct them out and glued them together using the lighter colored paper strips.

Next I glued on a strip of paper near the top to underline the title and a couple of wood filigree pieces  near the bottom corners.

I also measured and punched small holes to bind my book using my large crop-a-dile.  I glued papers to the inside cover and used a brush and liquid gold leafing on the edges of the chipboard.


I then measured, cut and scored all the pages, then marked the spots to punch for the binding thread to bind the pages to the cover.


After marking and punching all the pages, I separated them into 3 signatures and sewed them to the cover.

Here is a view of the outside of the cover with all 3 signatures stitched in place.


And this is the view from the inside of the book.  You can see between each pair of printed pages are two blank pages.  


These two blank pages will be glued together to form full page pockets. You can see below how I have place the double sided tape to form the pocket.


In this view you can see all the pockets are glued together with the tape.


 Now that all the pages and pockets are formed I used my Martha Stewart punch on all the upper corners to round them and add detail.


Next I used my 1/2" corner rounder to round all the bottom corners of the pages.


Following that I used distress ink to darken the edges of all the pages to give them an old used appearance.


Then came the embellishments.  I bought all the digital ephemera downloads for this pattern.  I cut and scored all the pieces and used distress ink on all the edges.

And there was a ton of embellishments.


I started gluing these onto each page along with some Christmas tags from my stash.  It was pretty late at night by that time and I forgot to take pictures.

Check back tomorrow to see where everything ended up and all the finishing touches I added to the album.


Happy Crafting!


Thursday, July 7, 2016

Trio of Vintage Mini Picture Frames


I found these 3 cute little frames.  They where empty and the
long one was broken in half.

The 2 small ones are about 4" and the larger oval is about 3" x 7".


This one appears to be very old,  When I found it,  it was broken in half where the dovetails joined.

And you can see the glass is very thick and hand chipped into shape.  I glued it back together as best as I could.  It had been apart so long it had warped a little.

I used a little Mod Podge and some gold gilding powder to restore the finishes on all three frames.
  

Then I went to my computer files and found three pictures I could size to fit these frames.

Using Mod Podge I adhered the 2 smaller ones to the frames.  Then I gave each one a coat of Mod Podge on top and used a stippling technique to remove any brush strokes and give the appearance of vintage pictures.

Next I hot glued a tiny white mulberry rose to the top of each frame and a tiny pink velvet bow to the bottom of each frame.  Around the edge of the picture where it meets the frame I ran a line of a bronze colored Stickles.


When I tilt them just right you can see the stippling and how the pictures appear old.


Now for  the oval frame.  Cleaned the glass really well added the picture and secured the backing.

At the lower break I added 4 white roses and a pearl and at the top a piece of pink dyed seam binding and a little pink velvet bow.  I also cut a metal filigree medallion in half and glued to each side of the roses. I aged all the bows and ribbon with a little touch of distress ink.


And just as I finished these my hot glue exploded.  Sparks and all.  A little scary.  Now to shop for a nice new gun before attempting any more of my projects.  Oh well, guess I could go paint something.


Happy Crafting!


`

Friday, April 15, 2016

Vintage Shabby Chic Swivel Frame


I love it when I find one of those old vintage swivel picture frames.  I never pass one up in a thrift store if it has a reasonable price.

Sometimes you find a cool vintage picture and other times they are empty.

This project is super simple, I started out with an empty brown frame.


I took the glass out and carefully cleaned it, the edges are really sharp.

Next I painted the entire piece with white chalk paint.  Then I went to my scrapbook papers and decided to use this French themed paper.  I used a couple of pieces of paper to make a collage to fit the frame.  Replaced the glass and secured the backing to hold the picture in place.

On the left side I made a white tulle net ruffle and hot glued the ruffle to the side.

That is it, simple, pretty and easy. Perfect for a bedroom or vanity table.


Happy Crafting!

Tuesday, January 26, 2016

Vintage Button Necklace


We are having another great day of rain.  It is so wonderful to see our dams filling with water.  We have a long way to go before they are totally back to normal.
It is my hope that this will be the winter to end our terrible drought.  Sorry if I say that so much but no water is pretty serious and it is so hard to keep our 1/3 acre with a dozen trees alive with so little water.  Last summer we had to cut our usage by 35 percent.  We did it, but it required hauling a lot of buckets of water collected as the facets where heating up so not to waste a single drop.

  So toady while I stayed inside avoiding getting wet I was searching through my stash of vintage buttons and decided to create a necklace using some of the vintage shell buttons.


Here is what I used, 8 shell buttons of graduated sizes, crystals, seed beads, crystal spacers and cream colored ribbon.


Used 2 sizes of beads.


Also 4mm bicone crystals and crystal spacers.


Vintage shell buttons


Here is a close up as I was added seed beads.  I knotted the string between each pair of buttons and 4mm crystals.


A little further along adding seed beads.


Here is my transition from beads to ribbon.  I used crimp bead and covers, jump rings and beading wire covers to protect the wire.  I also used 8 pound nylon beading wire.


Finished necklace about 26" long.


Happy Crafting!


Thursday, January 21, 2016

Vintage Drawer Pull Necklace


I have always love these drawer pulls.  At one time I had a very vintage styled kitchen and every drawer and cupboard had one of these draw pulls. There where glass door knobs on the doors leading into the kitchen and vintage glass towel racks. I also had a vintage stove that had 3 burners, a built in chili or soup pot and a grill down the center.  That stove was such a joy to use.  Unfortunately I sold the stove with the house.

So, For this casual necklace I used a small vintage glass drawer pull of the focal piece.


I ran a very long head pin through the pull and formed a loop at the top and added a flower shaped bead cap at the bottom with a loop .  At the top of the drawer pull, which is actually the bottom, I glued a antiqued brass crown piece using E6000.


On the top of the crown is a ring I used to hang the piece from a long antiqued brass chain using a large sturdy, heavy gauge,  jump ring.  I also added a clear rhinestone to the cross in the center of the cross at the top.


A the bottom I hung a small antiqued brass branch link that I dangled clear crystals from.  Also another clear crystal and an aurora borealis crystal with a bead cap hang at varying lengths.


This is another of my found object pieces that is always a good conversation starter when people realize it is made from a drawer pull like the ones in their Grandmother's kitchen.
  I enjoy having a few fun pieces of jewelry made from unexpected vintage finds.


Happy Crafting!


Tuesday, January 19, 2016

Vintage Paper Crown


This is a small vintage paper crown I made using vintage book pages and vintage music pages.


I first drew and cut out a template from card stock.  Traced the pattern onto the desired papers and cut out 2 pieces for the medallion and 2 pieces for the crown.  I glued the two pieces together before I cut them out for the crown and medallion.

I used the vintage book paper on the outside and the music paper on the inside of the crown. Glued these together of form a circle.  Next, using hot glue I added a piece of blue velvet ribbon to the lower edges.  Used distress ink over the piece.  Edged the crown with Platinum Stickles glitter.  And on the tips of the crown I added brown pearls.


I coated the entire crown with Mod Podge before adding the medallion.  I folded the medallion, glued that over the seams and added a series of stacked buttons for the focal point. On top of the buttons I glued a heart shaped golden rhinestone.


Happy Crafting!