Showing posts with label lamp. Show all posts

Thursday, February 15, 2018

Vintage Milk Glass Lamp Makeover


I have had this cute little milk glass lamp stored in the garage.  It had belonged to my hubby's mom.

I really like milk glass and I have several pieces,  so this little lamp needed to be added to my collection.


The little orphan lamp was really dirty, I cleaned her up.  I also went to Ikea and found a little white lamp shade to fit.


I'm not a fan of the wood.  So I gave it a coat of white chalk paint.


To the lampshade I added a green sheer ribbon I tied into a bow and added a pretty crocheted flower I had hanging around.


When I have some extra time I plan to round up all my other milk glass pieces and make a display.

Love how modern yet shabby chic she turned out.


Happy Decorating!


Tuesday, February 7, 2017

Thrift Store Lamp Redo #2


This is the second lamp I just refreshed and moved upstairs to my bedside table.  It is an old Princess House Crystal Lamp.  The hurricane piece  has the Princess House pattern etched into the glass.


When I bought the lamp the silver metal parts were not in the best of shape.  I used several colors of Rub N  Buff to give the metal a vintage look.


I removed the old moss branches and replaced them with fresh branches intertwined with a piece of rose garland and a few glittered green leaves.  I also added the porcelain white bird back to the lamp.


I used a rose leftover from the garland for the top of the lamp finial.  First I took the calyx off the bottom of the bloom and turned it upside-down and hot glued it to the top of the lamp finial.  


Next I hot glued each petal so the rose stays together and glued the finished rose to the top. 


I replaced the original shade on the lamp and moved it to the bedroom.   This was a quick pick me up that gave the lamp a fresh look.


Happy Crafting!


Wednesday, November 9, 2016

Fast Fall Yarn Bobbin Lamp


It is hard to believe but we are having a heat wave of sorts.  It is the first week of November and all the doors and windows are open and it is almost 75 degrees.  Too warm again today.

Even so, I have been trying to get into the mood for cool weather and Fall decor. 

I have several of the old wooden yarn bobbins. 


I was trying to think of something to do with them.  I said to myself how about a small lamp.

I gathered my supplies and began assembling.


I attached the little vintage electric light to the top of the wooden bobbin using museum wax.


Next I added a large glass bobeche. 


Added a small Autumn wreath and an amber glass shade.


And lastly I added a silicone rustic light bulb.


Within a few minutes I had a really cute Fall lamp.


Happy Crafting!

Wednesday, August 17, 2016

Ikea Flowerpot to Hanging Light Conversion


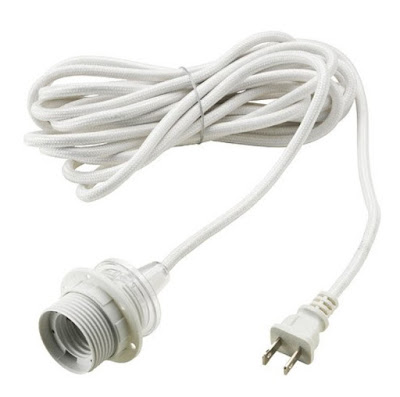
On my last visit to Ikea I spotted these cute little lacy flowerpots.  And while looking at them I decided this would make a darling hanging lamp.


The first thing I did was to get my drill and bit and drill a circle of holes to create an opening to fit over the light kit socket.


I decided I wanted to add crystals to the bottom edge.


I glued the crystals around the edge following the scallops.


Then simply screwed it to the light kit, added the light bulb and plugged it in.


Love the way the light sparkles through the metal lace of the shade.


Happy Crafting!


Thursday, June 9, 2016

Brass Lamp and Lampshade Makeover


Well, we are finally having our first heat wave of the year.  Time to hibernate indoors until the sun goes down.

Last night at about midnight I decided I needed a lamp on the bedside table I just finished.  Hmmm. The only one I could move into the guest room was brass with a dark green shade.  No! Just not right.

I think I get a little daring in the middle of the night. Anyway I decided to paint the lamp aqua.  Now what to do about  the shade.  Well, I read somewhere you can paint fabric with chalk paint.  So that's what I did.


Like I said it was the middle of the night so I forgot to get before pictures.  The shade was dark green like the one above.  And the lamp to the right is very similar to the one I had


I gave the lamp 2 coats of aqua chalk paint.  I really like the color and the shape, now.


The lampshade also took 2 coats of paint.  I used a small stiff brush to work the paint into the trim.

When the paint was dry I used a stencil with gray chalk paint to add the focal medallion.  I was initially concerned that the very dark green fabric would be difficult to hide.  But no, the paint completely covered the dark color.


The lamp gives off a nice soft light for bedside the bed.  Not too bright and glaring.  I have a reading light that is mounted on the wall directly over the bed.  So there is need for bright light from this lamp.


Now I just might have to paint the reading light shade to match this lamp.  I will have to give that some thought.  The fixture is also shiny brass.  Maybe I will paint that to match this lamp, also.


Happy Crafting!


Wednesday, May 4, 2016

No More Blue Lamp


You can just see the base of the ugly Target blue lamp on the right side of the picture.  I like the light that it gives off but definitely won't go with the new color scheme.


The first thing I did was hot glue the same black ball fringe I used on the vanity skirt to the edges of the lampshades.  I also used two pieces of a vintage art deco belt buckle on each shade.  I have had this buckle in my stash forever.  Could never find a use for it.  But here it adds just the right amount of sparkle.


And here is a close up. So far this redo looks awful against the dark blue.  So that will be the next step.  Get rid of that blue.


 I removed the shades and painted the whole lamp with white chalk paint.  When it was dry I painted a few hot pink and gold stripes to the main upright.  and then cut a few strips from the zebra pattern adhesive paper.  I put the wider pieces under the pink stripes and the smaller piece around the base of the lower lamp.  Then I added a hot pink tassel at the top and two decals to the upper shade.  Zebra themed, of course.

Love my redesigned light.


Happy Decorating!