Showing posts with label canvas. Show all posts

Friday, August 18, 2017

Art Canvas Vase


Well, it took me a lot longer than I expected to rearrange my living room furniture, dust and vacuum. Then put everything back in place.  Four days in total.

I did, however, find time to make a new flower vase for my living room.

I started with an 11 x 14 inch canvas that I glued a piece of sheet music from an old book I picked up last year to use in projects.


Next I aged the dried page with distress ink.


On the back side of the canvas I glued a soft vase I had purchased at the Dollar Store last year using my hot glue gun.


Terrible color but it won't show on the back side of the canvas.  Just at the top of the vase I used an Xacto knife to cut a slit about 3 inches wide then stretched the opening a bit so my flower stems will slip through


I had this left over pretty floral fabric from an old bed dust ruffle.  I cut a piece to fit over the bottom of the canvas plus enough to stretch around the back and hot glued in place.


Next I hot glued the back I had saved from an old picture frame so my canvas will be able to stand.


I added embellishments to the top corner and lace across the top.


Lots of odds and ends, flowers and metal bits.


On the right side I added a crystal and a couple of flowers.


Here it is ready to fill with water and flowers.


Happy Crafting!


Monday, January 25, 2016

Altered Artist Canvas


Getting ready for Spring again, today.  I decided I wanted to do an altered canvas for the wall instead of a painting this time.

I started off with a blank white stretched artist canvas.


I went online and found a pretty floral picture for my altered canvas piece.  I sized the picture to fit a piece of printer paper.

original image
Then I cut out a piece of plain white tissue paper about an inch larger all around than the printer paper.  I centered the printer paper on the tissue, carefully folded all the edges to the backside and taped  it in place.  Next I ran this piece through my printer transferring the image to the tissue side of the paper.  Let the ink dry a bit and cut it off the printer paper along the edge.  Be sure if your image has any writing that you print it in reverse so it will read correctly when glued face down.  The reason I glued the image face down was to put the ink against the canvas to keep it from smearing when painting on the final heavy coat of Mod Podge.

I covered the entire canvas with an even coat of Mod Podge and carefully laid the tissue, ink side down, on the canvas, trying to avoid having any air bubbles.  I very gently dabbed the tissue with my fingers to adhere it to the canvas.  It is very fragile at this state.  So you need to use the very lightess pressure possible to avoid tearing the tissue.  I let that dry and then I painted the edges of the canvas with acrylic paints to blend with the picture and cover the white edges of the canvas.

Once the paint and Mod Podge where dry I coated the entire picture with a heavy layer of Mod Podge leaving brush strokes visible in the finish.

Here you can see the final coat of Mod Podge still drying. The image still has white areas that haven't dried completely,


These are the embellishments I am planning to add to the canvas when it is dry.  


In the final piece I also added a green butterfly to the top right corner.


Detail of added flowers and clear rhinestones.


More added flowers, rhinestones and copper colored flower stems.


And here is the finished piece with lace topped with the white cording to finish the lace's top edge , pearls and dragonflies hot glued to the bottom.


Happy Crafting!


Wednesday, November 25, 2015

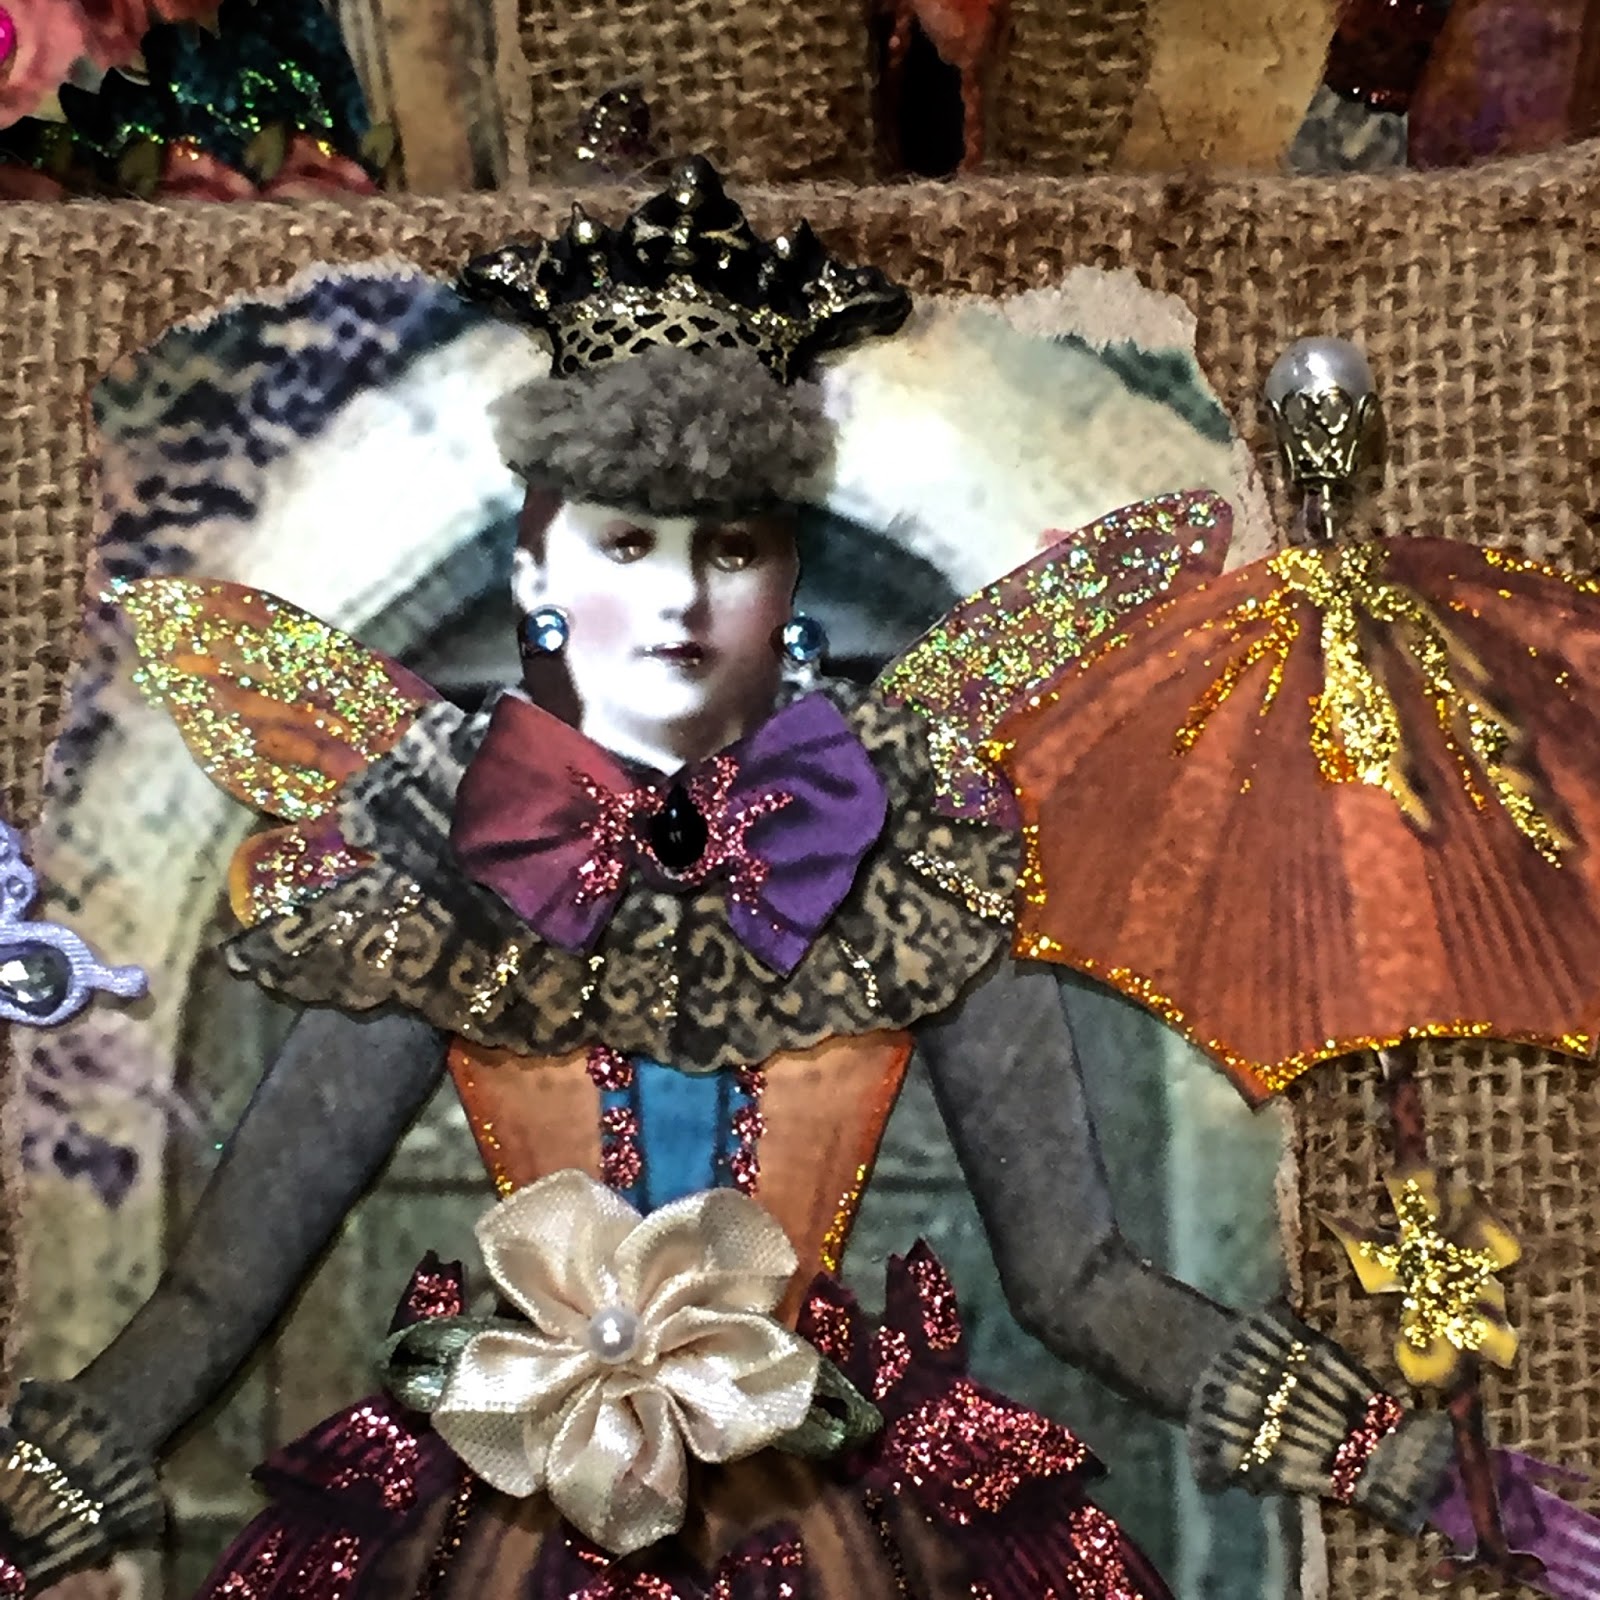
Trio of Altered Fairy Burlap Canvases


I found a pack of three burlap canvases that where just asking to be altered.
I have had this idea for some time.
I found these fairies on Pinterest and went to town adding all kinds of details and bling to these canvases.


I made the crown, fleur d Lis and bee by filling silicone molds with hot glue.  When it was cool I popped the out of the mold.  Painted them black and then highlighted with gold Rub N Buff.


I accordion folded all their skirts to make them 3 dimensional.  Each fairy is glued on an image of a vintage doorway from Pinterest and tore the edges before gluing to the canvases.


Lots of bling.


Happy Crafting!


Wednesday, October 14, 2015

Altered Burlap Canvas


This little 5" x 7" altered canvas was fun to make.  I used a lot of odds and ends from my stash.


I distressed the entire canvas with brown distressed ink.  Next I screwed two small eye hooks to the top corners. Then I edged the entire piece with a shabby brown edging from May Road.  

With hot glue I added the blue burlap type trim across the bottom and dark brown rose trim down the left side. I inserted a pearl topped hat pin in the center and glued pearls to the other two.  

On the right side of the piece I glued a clock face  from 7 Gypsies with a train ticket tucked behind and an Eiffel tower tag.  And tucked a little Graphic 45 tag behind the blue trim where I attached a little pink rose applique .  And on top I added a little tag that says 
" Memory is the treasury and guardian of all things."  I highlighted few areas with Stickles


Here I added strip of sparkly paper, a lace medallion and a few pearls


On the bottom I attached a chandelier crystal that I backed with a floral piece of paper.  


Thursday, October 8, 2015

Album in an Artist Canvas

6" x6" covered canvases
And lastly,  today's project with DCWV Le Tres Chic 12" x12" paper stack is a 4" x 4" mini album hidden between two 6" x 6" hinged artist canvases.

painted the edges of the canvases black to match my paper, then covered them inside and out with the scrapbook papers once the paint was dried.  I used two tiny brass hinges to connect the canvases together. On the bottom corners I hot glued 4 large silver grey pearls for feet so my finished project will stand on its own.


closure on the outside
The edges I covered with a flat lace I attached with glue.  Then added the tiny closure with the screws that came with the lock and screwed it right into the wooden frame of the canvas.


inside with mini album in place


Front cover of mini album, here you can also see the hinges I used on the inside to attach the  canvases together .


And here is the finished inside where I also painted all the edges black just in case I had any gaps in the paper.  I didn't want any of the white canvas to show through.


back of cover of mini
The photos below show the detail of the album pages.


Believe or not but this tiny album has tons of space for photos and journaling.  
There is space for at least 30 photos.


back cover of hinged canvases