Tuesday, January 30, 2018

Sock Gnome Valentines Version


On a rare visit to Walmart yesterday I spotted these Christmas stockings for only 19 cents.  I immediately thought I could use these to make Valentines Day gnomes.  Of course I did, what else would a person think of when seeing a stack of Christmas stockings?


I used the toe of the stockings for the base of my gnome.  I also cut the white top off to cut out the beard.


I began forming my gnome by filling the toe with rice and tying the top with twine to secure.


Next I fitted the top of the leftover sock from my winter gnome as the hat.


Then it was time to cut the beard from the white fabric.  Once it was cut out I ran a bead of hot glue along the edge on the wrong side and rolled the edge to the back.

I also cut out and stuffed the nose and glued it in place.


Then glued the beard in place. Next I folded the hat to the wrong side and glued it in place.


And finally I tied his hat in the middle and at the top with white eyelash yarn and glued two red hearts cut from the red stocking material.  I also looked through my stash and found two crystal gem hearts that I added to finish my gnome.


Happy Crafting!


Friday, January 26, 2018

Shabby Chic Faux Mounted Deer


For the last couple of years I have had my eyes open searching for a faux deer head I could mount in a picture frame and decorate.  I have seen these done but couldn't find one I liked plus could afford.  This one is cute but I decided to do mine in colors to match my decor.


Here is my find.  I was at Target after Christmas and found this metal deer for 50% off.  It is a little over a foot tall and quite heavy.  Perfect for this project.


Next I found a picture frame at a thrift store that I added a little gold Rub N Buff to help it coordinate with the deer.


I chose these 2 colors of scrapbook paper to cover a piece of cardboard cut to fit the frame for the backing.


Using the black and white paper I covered the 4 corners of the cardboard by glueing it in place with Mod Podge.


Then I took the pink piece of paper and glued it diagonally to the cardboard and trimmed the overhanging corners.


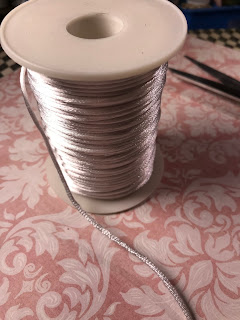
Next using white rat tail trim along the line where the 2 papers meet I used hot glue to adhere the trim and give the backing a more finished appearance.


Using paperclay I molded 4 embellishments, one for each corner.


Painted them while wet with sheepskin chalk paint.


Added 2 shades of Rub N Buff, a tarnished silver and a tarnished gold combination on the raised areas when the paint was dry.  I glued them in place then hot glued the board to the frame.


Next I mounted the deer to the backing of the frame.


And finally I added a few mulberry flowers and leaves and a little lace with hot glue.


All finished and hanging on the wall.  Love the way it turned out.   The wait was worth it.  I hung him above my other creations in the living room.


Happy Crafting!


Wednesday, January 24, 2018

Thrift Store Stool Makeover


Awhile back I picked up this not too cute little blue stool at a thrift store for a couple of dollars with the intent of doing a makeover.


I began by giving it two coats of chalk paint in Sheepskin, a soft off white color.


first coat of paint

Then using paper clay and several different IOD moulds I added details to my little stool.

First I added a rope type border to the top.


Then I added individual medallions to each end.


I gave the entire piece a second coat of paint, added clear wax, let that dry, buffed, then added a coat of dark wax and immediately buffed it off the raised areas leaving the dark wax mainly in the recessed areas.


I am planning to use this piece as a riser for a plant or for something I need to lift up higher than surrounding items.


Happy Crafting!

Monday, January 22, 2018

Unfinished Table Redo


I have been wanting a new small kitchen table.  So, for Christmas my hubby gave me an unfinished drop-leaf table, moulds and stamps to finish the table.


 Assembly was very easy, just 8 bolts to attach the legs.


I used paper clay and this mould set to add details to the table.


I immediately glued the medallions to the table skirt and legs.  You can see a sneak peak of the stamps I also planned to use.


Then I painted the legs white and the top gray using chalk paint.


When the white paint was dry I went over the raised areas of the medallions with gray to make them pop.


Next I used white chalk paint with the rubber stamps and stamped the top of the table.  I also added gray stripes to the skirt of the table and applied gray to the bottom few inches of the table legs.


I stamped a random medallion pattern to the top.


And the last thing I did was to wax the entire piece.  Love my new little table.


And of course my assistant did her final quality control check.


Happy Crafting!